Shed Painting Saga: Brushes, Blunders, and Breakthroughs
Episode 4 of The Woodworking Shed Workshop series. In this episode we're getting the inside of the shed painted in preparation for the next steps!
Brushes, Blunders, and Breakthroughs
Welcome back to The Woodworking Shed! Have you ever started a project thinking it would be quick and easy, only to have a cheap tool turn it into a nightmare? In this post, I’m learning that lesson the hard way... with paint brushes! I’ll also be bumping into a snag and finally making a decision on insulation!
I’m making good progress! Painting the inside of the shed is the last hurdle before moving on to more exciting things!
New to The Woodworking Shed?
Catch Up: Explore every episode in this series and more on the index page!
Last Episode: Missed the last episode? Dive in here:
Join the Community: Subscribe for free to get the latest projects, tips, and tales from The Woodworking Shed. Let's build something together! 🪚
The Ill-Fated Supply Run
When buying paint supplies, I aimed for cheap and cheerful! Not forgetting that this will be covered up later by the insulation and sheathing. All it needs is a little extra protection for peace of mind!
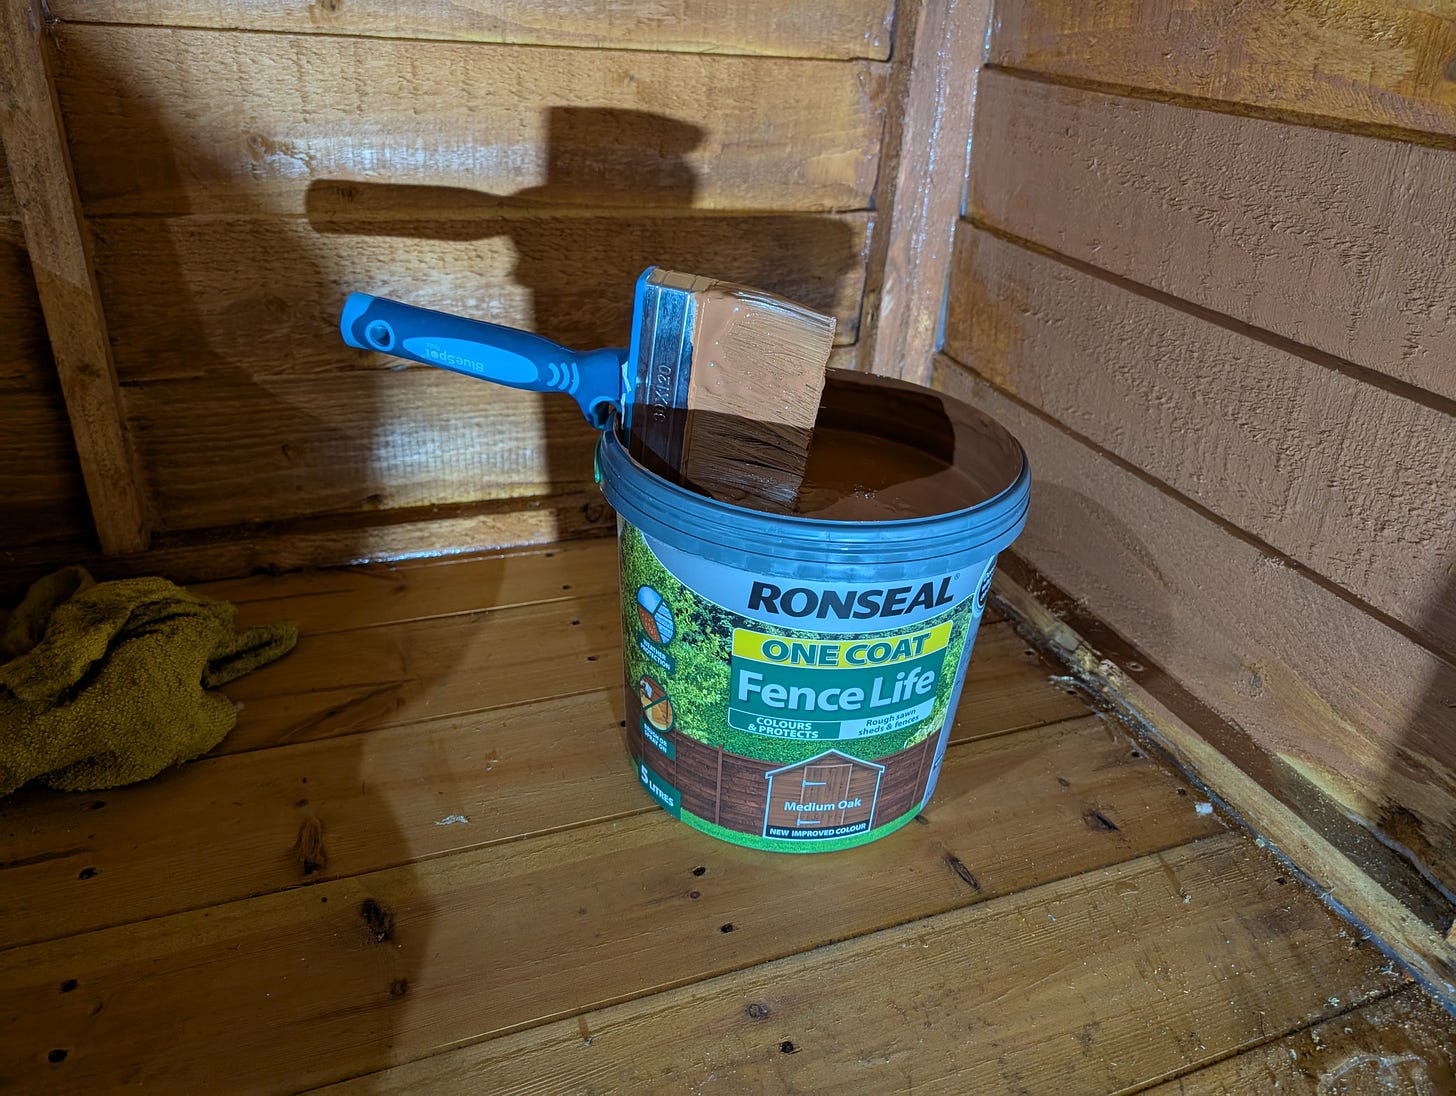
Armed with absolutely zero shed painting knowledge, I blindly went to a local DIY store expecting a tough decision ahead. As it turns out, it’s quite easy to buy fence paint in February - they hardly have any in stock! With such limited choice, there was no need for umming and ahhing. Perfect!
In the cheapest range, they only had black and medium oak brown, so medium oak it was. Lighting is already a challenge, imagine if I painted the inside black!
There were a few brushes to choose from, but I settled for the cheapest, knowing I was going to throw it away as soon as the painting was completed.
Here are links to the products bought:
When a Cheap Brush Becomes a Nightmare
In my own naivety, I thought that painting the inside of the shed would only take a couple of hours… The reality is that after two hours, I only managed to finish one corner. A few extra nights of work than anticipated here!
The Blue Spot paintbrush is awful…
I’m not sure if the weight of the brush or the handle ergonomics are the issue. - But it makes my hand and wrist ache very quickly.
To make matters worse, it barely applies any paint! I expected a brush designed for painting fences to apply paint very quickly, considering the task.
The brush is fundamentally flawed
I would not recommend it to anyone looking to paint their shed or fence. I should have known this really, I have had the same experience when decorating my house.
Do not buy cheap paintbrushes!
I honestly didn’t think it would matter with this level of slap-on quality, but apparently, it does. The adage rings true yet again:
If you don’t buy nice, you buy twice…
I have resorted to an old interior decorating brush. It might be losing a bristle here and there, but I am not looking for a good finish.
It’s a quarter of the size of the blue spot, but the speed is easily more than four times faster!
An Unexpected Storage Solution
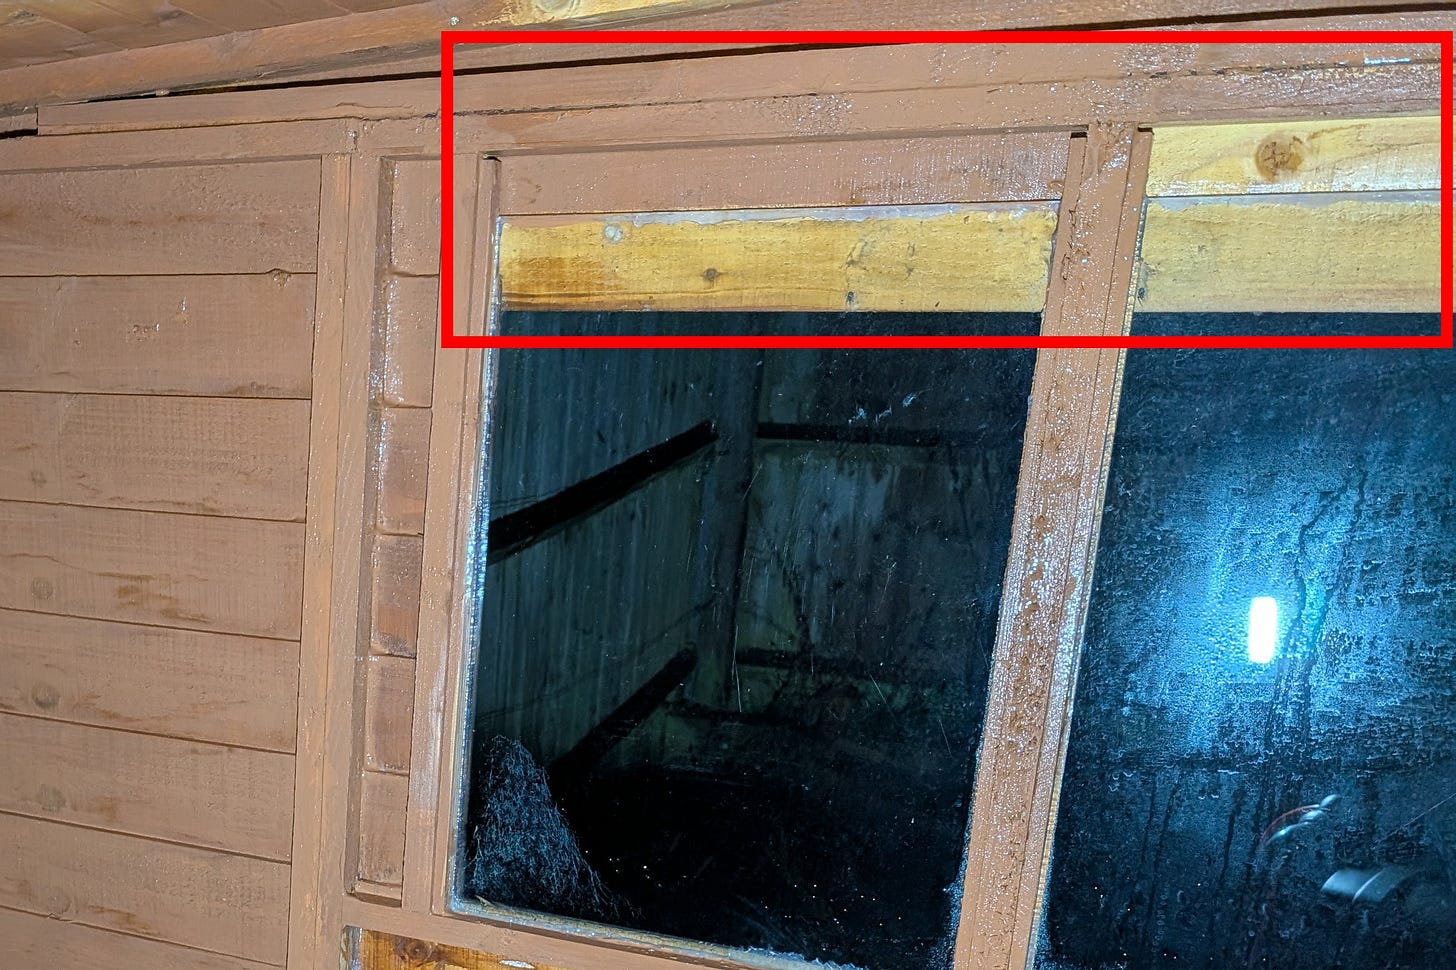
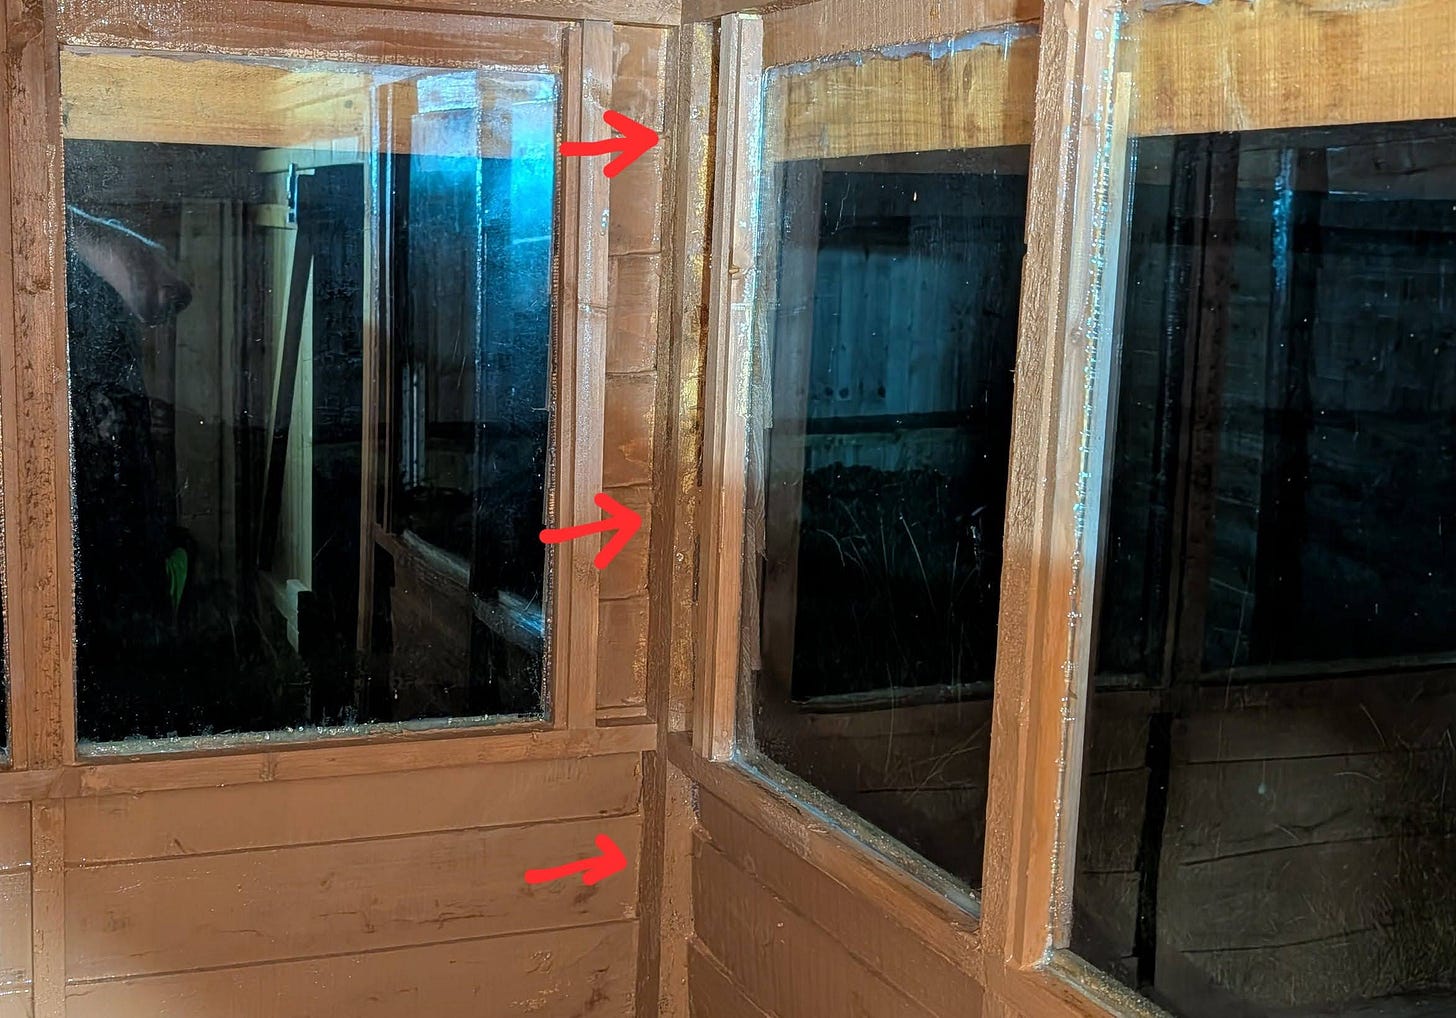
I hadn't noticed this little gem before I started painting! But once the paint started going on, it became obvious…
The window panes are much bigger than the window cut-out at the top (You can see it in the photo). It is very noticeable now as the area behind the glass is a different colour. This is an exciting find! Working with such a small area storage space is at a premium!
When I eventually put up the OSB internal walls. They will be cut to match the external window cut-out. This will give more space above the windows, and it is at the perfect height to have some shelving all the way round to the door!
I just need to remember not to fit long screws and smash the glass… Why does writing this feel like I am sealing my fate??
Halfway There: The Paint Transformation
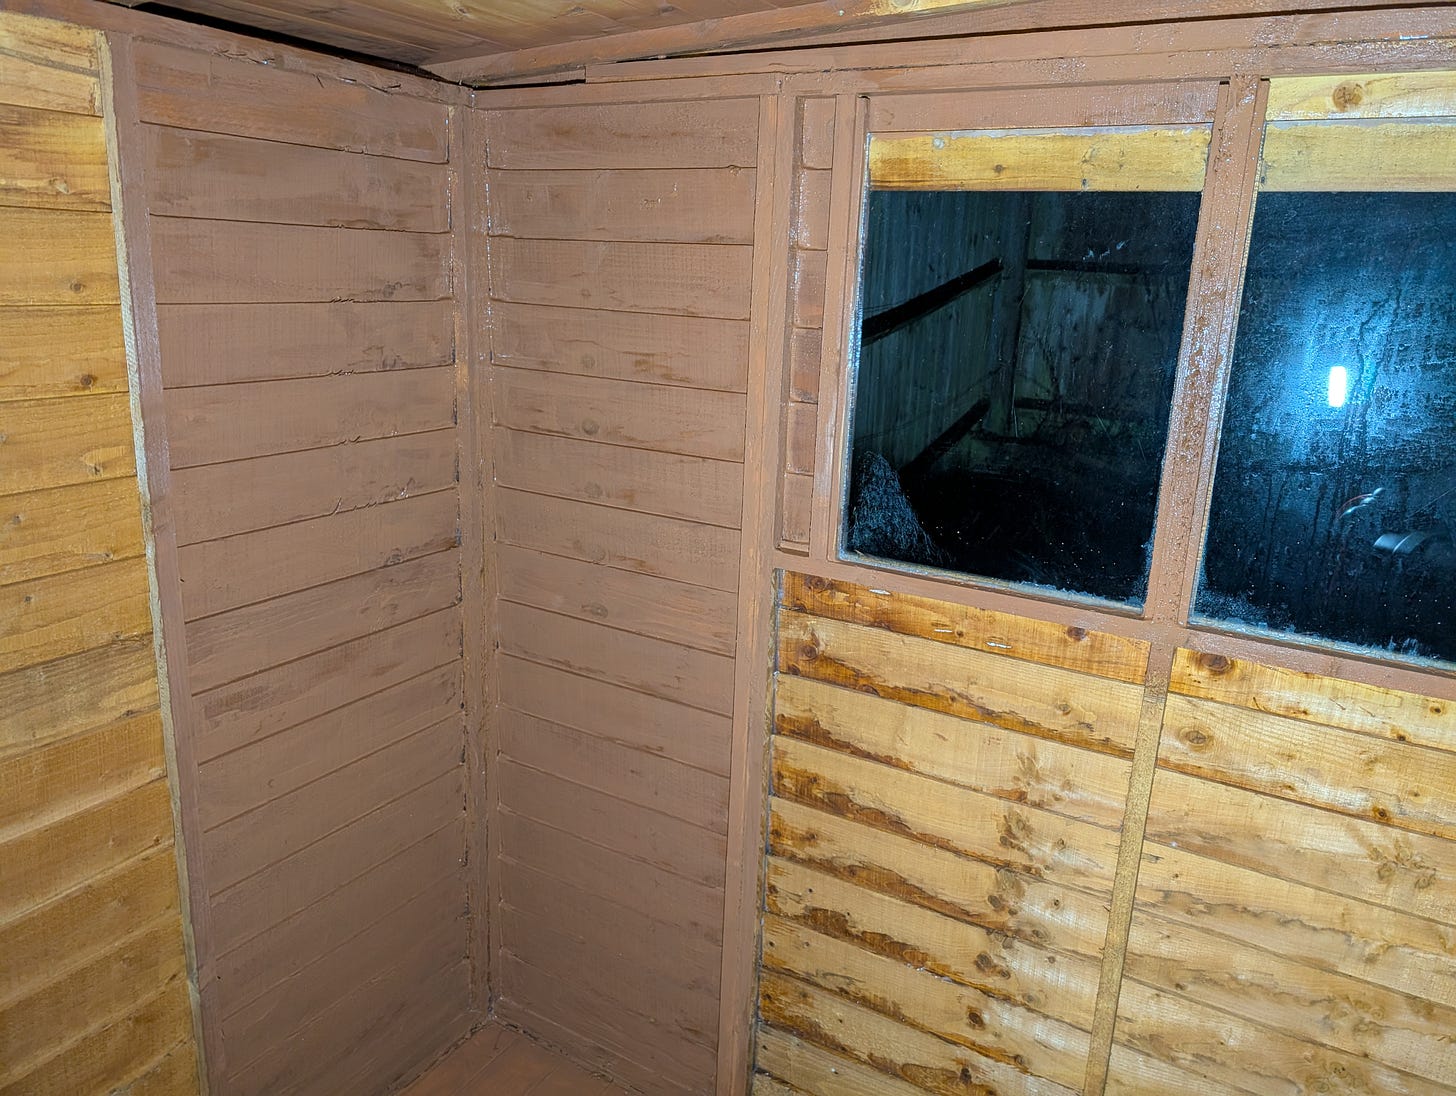
With the new brush in hand, I managed to get half of the shed painted in a night -much faster progress! I definitely got paint in my hair though…
I had to wait for the first half to dry before tackling the second half. I needed to move the bikes!
Using this paint is like painting with chocolate in colour and in texture. I did find myself wondering who would want this colour on their fence before remembering there may have been a reason it was the only non-black colour in stock…
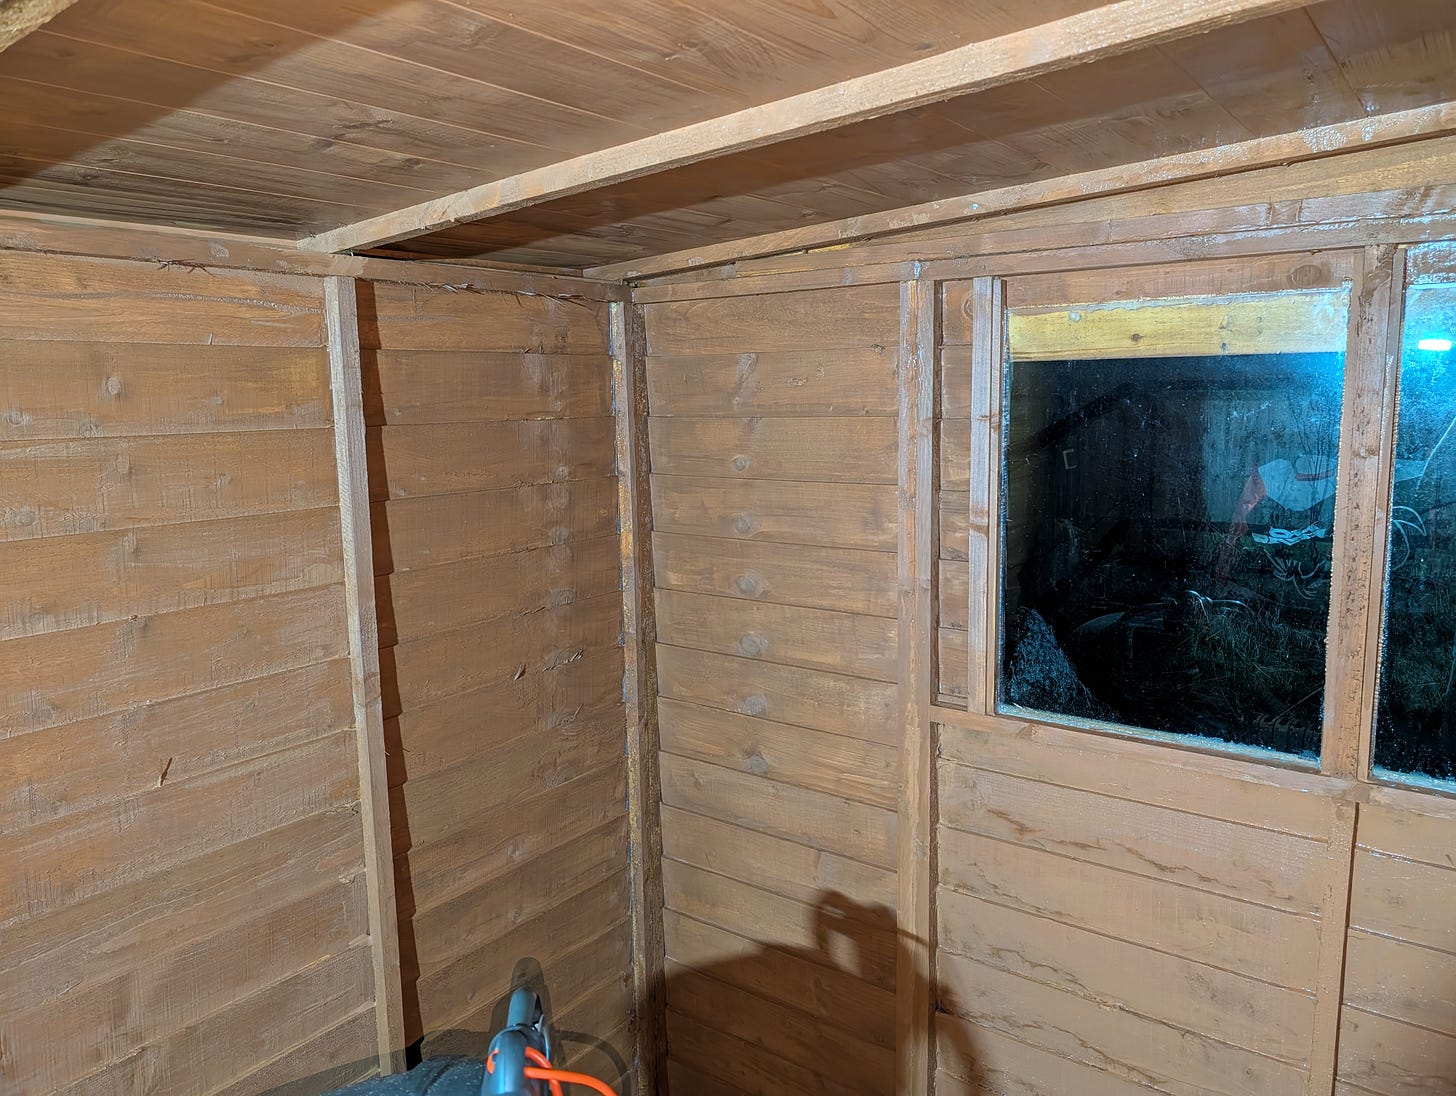
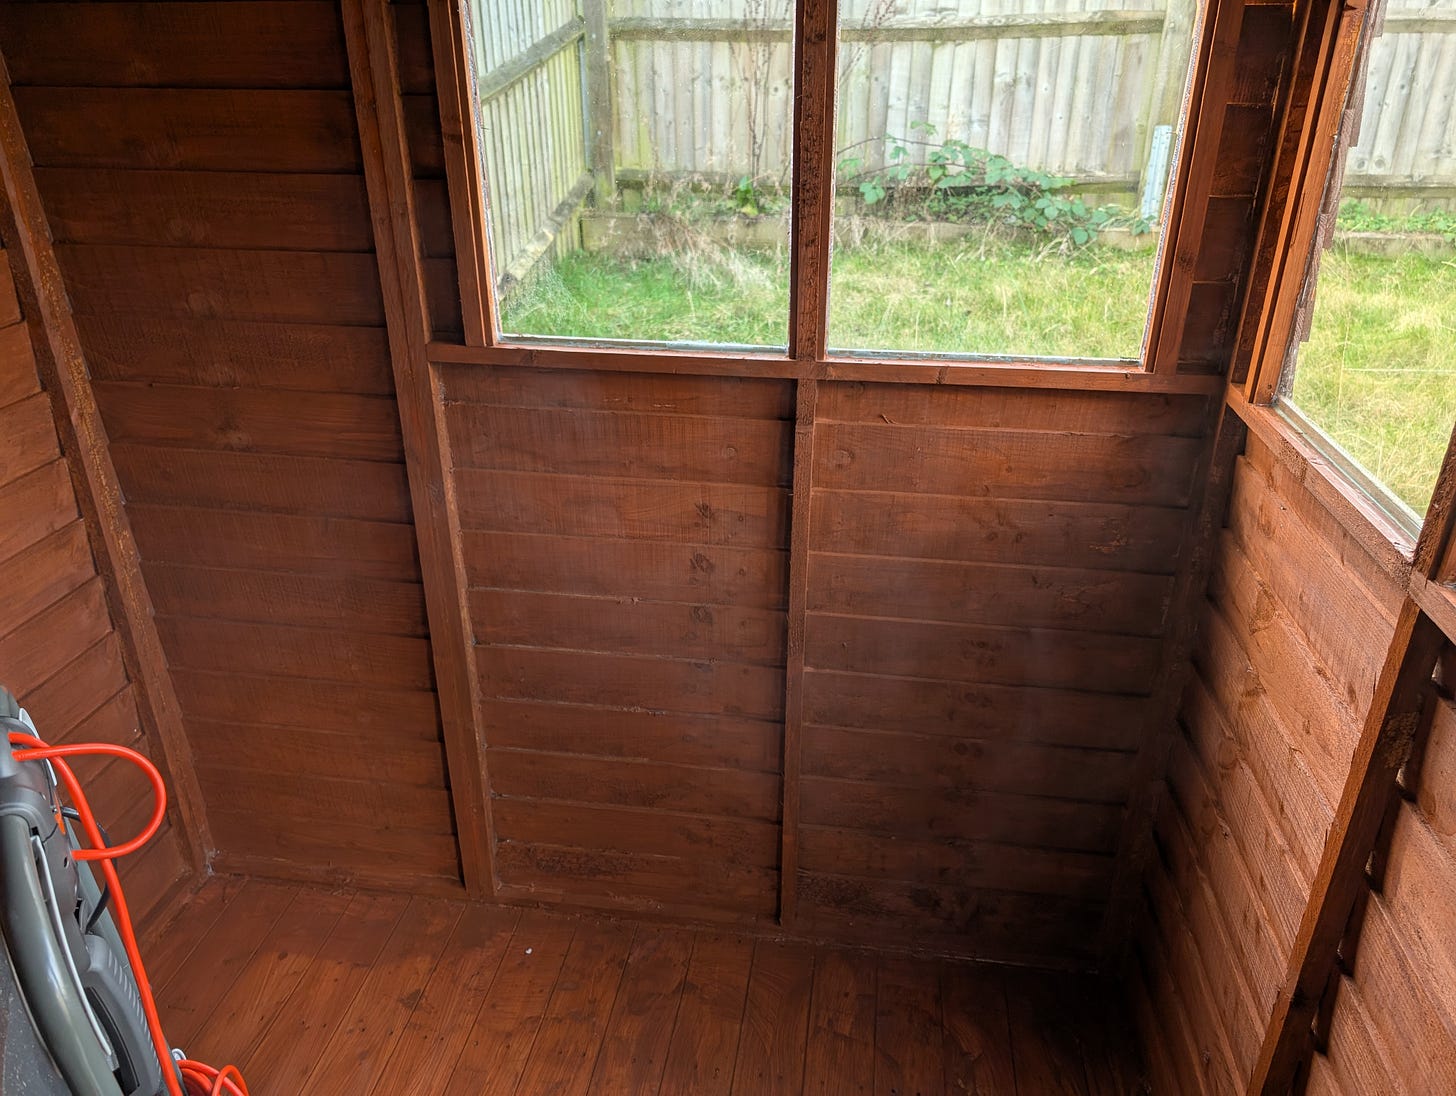
…Perhaps I was too quick to a conclusion on the paint. When it dries, the colour changes massively. It looks quite nice once dry, even with my rough paintwork…
The Hidden Structural Challenge
While taking a break from painting, I was looking around the shed, as you do - sizing things up. I realised that I had a problem: I can't just insulate and sheath this shed… It won't work.
The corner design where the shed panels are screwed together only leaves material to mount boards on one face.
You can see this below in my very artfully annotated photo - There is nothing to screw into!
I will need to fit additional framing inside the shed to provide a proper mounting face for the internal walls. If I don’t do this the OSB panels will be able to flex in the corners. Not ideal when you’re planning to mount things to them!
The silver lining is that by adding more framework, the overall shed structure will be stronger - Can’t complain about that!
It's a good job that I have noticed this now. If I had already fitted the insulation, I would have a lot of work on my hands to make this right.
Insulation Decision Time
It’s decision time…
In the last episode, I shared my doubts about insulation. Whether or not having an aluminium foil barrier and PIR boards was necessary.
I have made up my mind!
I will not be installing PIR boards at this time. I will only install an aluminium foil vapour barrier. This will only provide minimal insulation, but based on my current experience, I think it will be enough. I still believe that the vapour barrier is the most important element of this project.
Perhaps this is a decision that I will regret in the future. If that is the case, then I will have another project on my hands and there will be a very public mistake for everyone to learn from!
Do you have experience with insulating a shed? I want to hear about your experiences in the comments!
Painting Complete & What's Next
It took three nights in total, but the inside of the shed is finally painted!
I was a bit worried that I was going to run out of paint towards the end but I scraped through. I didn't think I would use so much but I was just slapping it on!
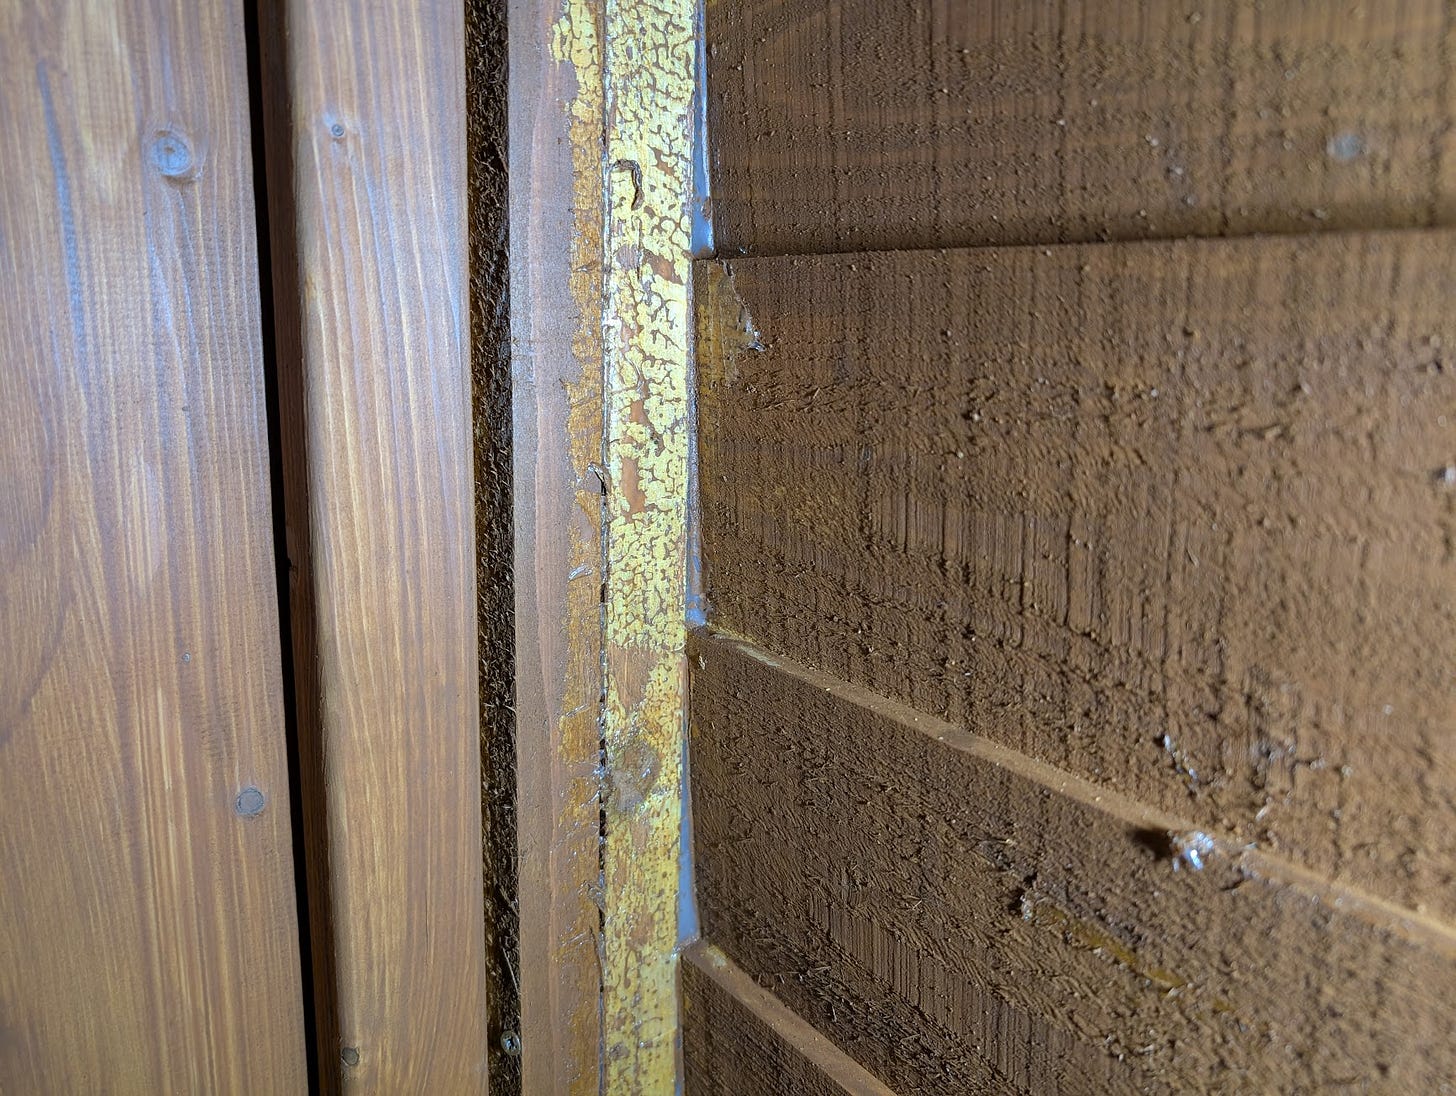
One final note to anyone who may be thinking of doing this: The sealant I have used states that it can be painted. As you can see in the photo, it hasn't worked.
I am wondering if that's because while it is advertised as a paint, the stuff I have used is more of a stain. Just something to bear in mind!
I managed to complete the painting in two halves by moving everything inside from one side to the other with time to dry in between - This’ll be fun when fitting the vapour barrier… I'm going to have to make a plan.
Moving forward, I need to work out how I’m going to fix this framework issue before I can add the internal walls! In the meantime, I am going to have to go and buy some new tools…
See you next time!
Have you built your own workshop before? Was it from scratch or a conversion? Let me know in the comments!
How You Can Help!
Just hitting that like button on my posts helps me to get The Woodworking Shed noticed!
If you'd truly like to support my mission to make woodworking more accessible, you can do so by becoming a paid subscriber or by buying me a coffee!
Early bird paid subscribers get 33% off forever!
Your support directly enables the growth of The Woodworking Shed and supports accessible woodworking!
Look forward to hearing from you -
~ The Woodworking Shed
Hungry for more?
Here’s the next episode!
Want to check out my other content? Head over to the homepage to find it all!


