


The Secret to Perfect Cuts: Understanding Woodworking Sharpening
In this episode im exploring the different methods of getting razor sharp edges on my woodworking tools to figure out which is best for my woodworking toolkit.

New to The Woodworking Shed? I’ve got you covered! I've made this handy index page to find every episode in this series and more!
Here’s a link to the previous episode!

Keeping Tools Sharp
Welcome back to The Woodworking Shed! Ever felt the frustration of a dull blade tearing at your wood instead of slicing cleanly? I certainly want to avoid that feeling, which is why I’m taking a deep dive into the world of sharpening systems!
This is it! The final piece in the puzzle. Once I figure out which sharpening system to buy, my beginner’s woodworking toolkit will finally be complete!
I’m excited to get started and sharpen my own tools. But first, I need to cover the basics and improve my understanding.
Join me as I explore the options and ultimately decide which sharpening system will help me unlock the full potential of my tools.
Let’s get started!
The Benefits of Sharp Woodworking Tools
So why is it so important to keep tools sharp?
There are several great benefits to maintaining sharp tools. The most important being a superior finish! This is because a sharp edge ensures that the wood fibres get cut cleanly, reducing the chances of the dreaded tearout. This should be enough incentive for anyone. With a bit of skill and good sharpening skills, the time spent sanding a project can be reduced to nothing!
The second benefit is added efficiency. Simply put: Sharp blades cut better, and they cut faster. Both of these lead to less energy being used, keeping you planing or chiseling for longer, without fatigue - Something I think every woodworker wants.

Finally, perhaps a little against the grain… Sharp tools are safer than dull ones! It is a lesser-known fact that more knife injuries happen in the kitchen because of dull blades than with sharp ones!
So why are sharp tools safer?
It’s the extra effort required to work them, you need to press down harder, use stronger hammer swings, the next thing you know your chisel has slipped and you’ve hammered your hand or chiselled a finger… Not ideal!
With all of that in mind, who wouldn’t want sharp tools? Let’s take a look at some common sharpening systems used…
Have I missed any benefits? Let me know in the comments!
Scary Sharp
Anyone who has looked into sharpening will have come across this term. It refers to the use of varying levels of abrasive grit sheets to provide a “scarily” sharp edge. It’s a cool concept and realistically may be one of the easier methods for a new woodworker to pick up because of its simplicity and low cost to get started with.
All you need are some different abrasive grit sheets, a honing guide, and a flat surface like a piece of glass, and you have a sharpening system!

It is quite wasteful, though! Tools should be sharpened regularly, and depending on how often you use them, you will have to keep replacing the abrasive sheets…
Over time, using the “scary sharp“ system will likely work out to be much more expensive than investing in some real sharpening tools. It could be a good place to start, though!
Japanese Water Stones
Japanese water stones are usually man-made but natural stones do exist. They are known to be effective, fast-sharpening tools. They do have a couple of drawbacks though!
Firstly, they need to be soaking wet when used. The reason for this is that the water carries away the abraded material, preventing it from settling in the stone. It keeps it clean basically.
Secondly, water stones wear through use and need to be flattened periodically. I’ve seen various accounts online where people have moved away from water stones because of water and mess!
I’m unsure about using water to sharpen tools that rust. I think keeping rust at bay is going to be hard enough without introducing more water to my workshop!
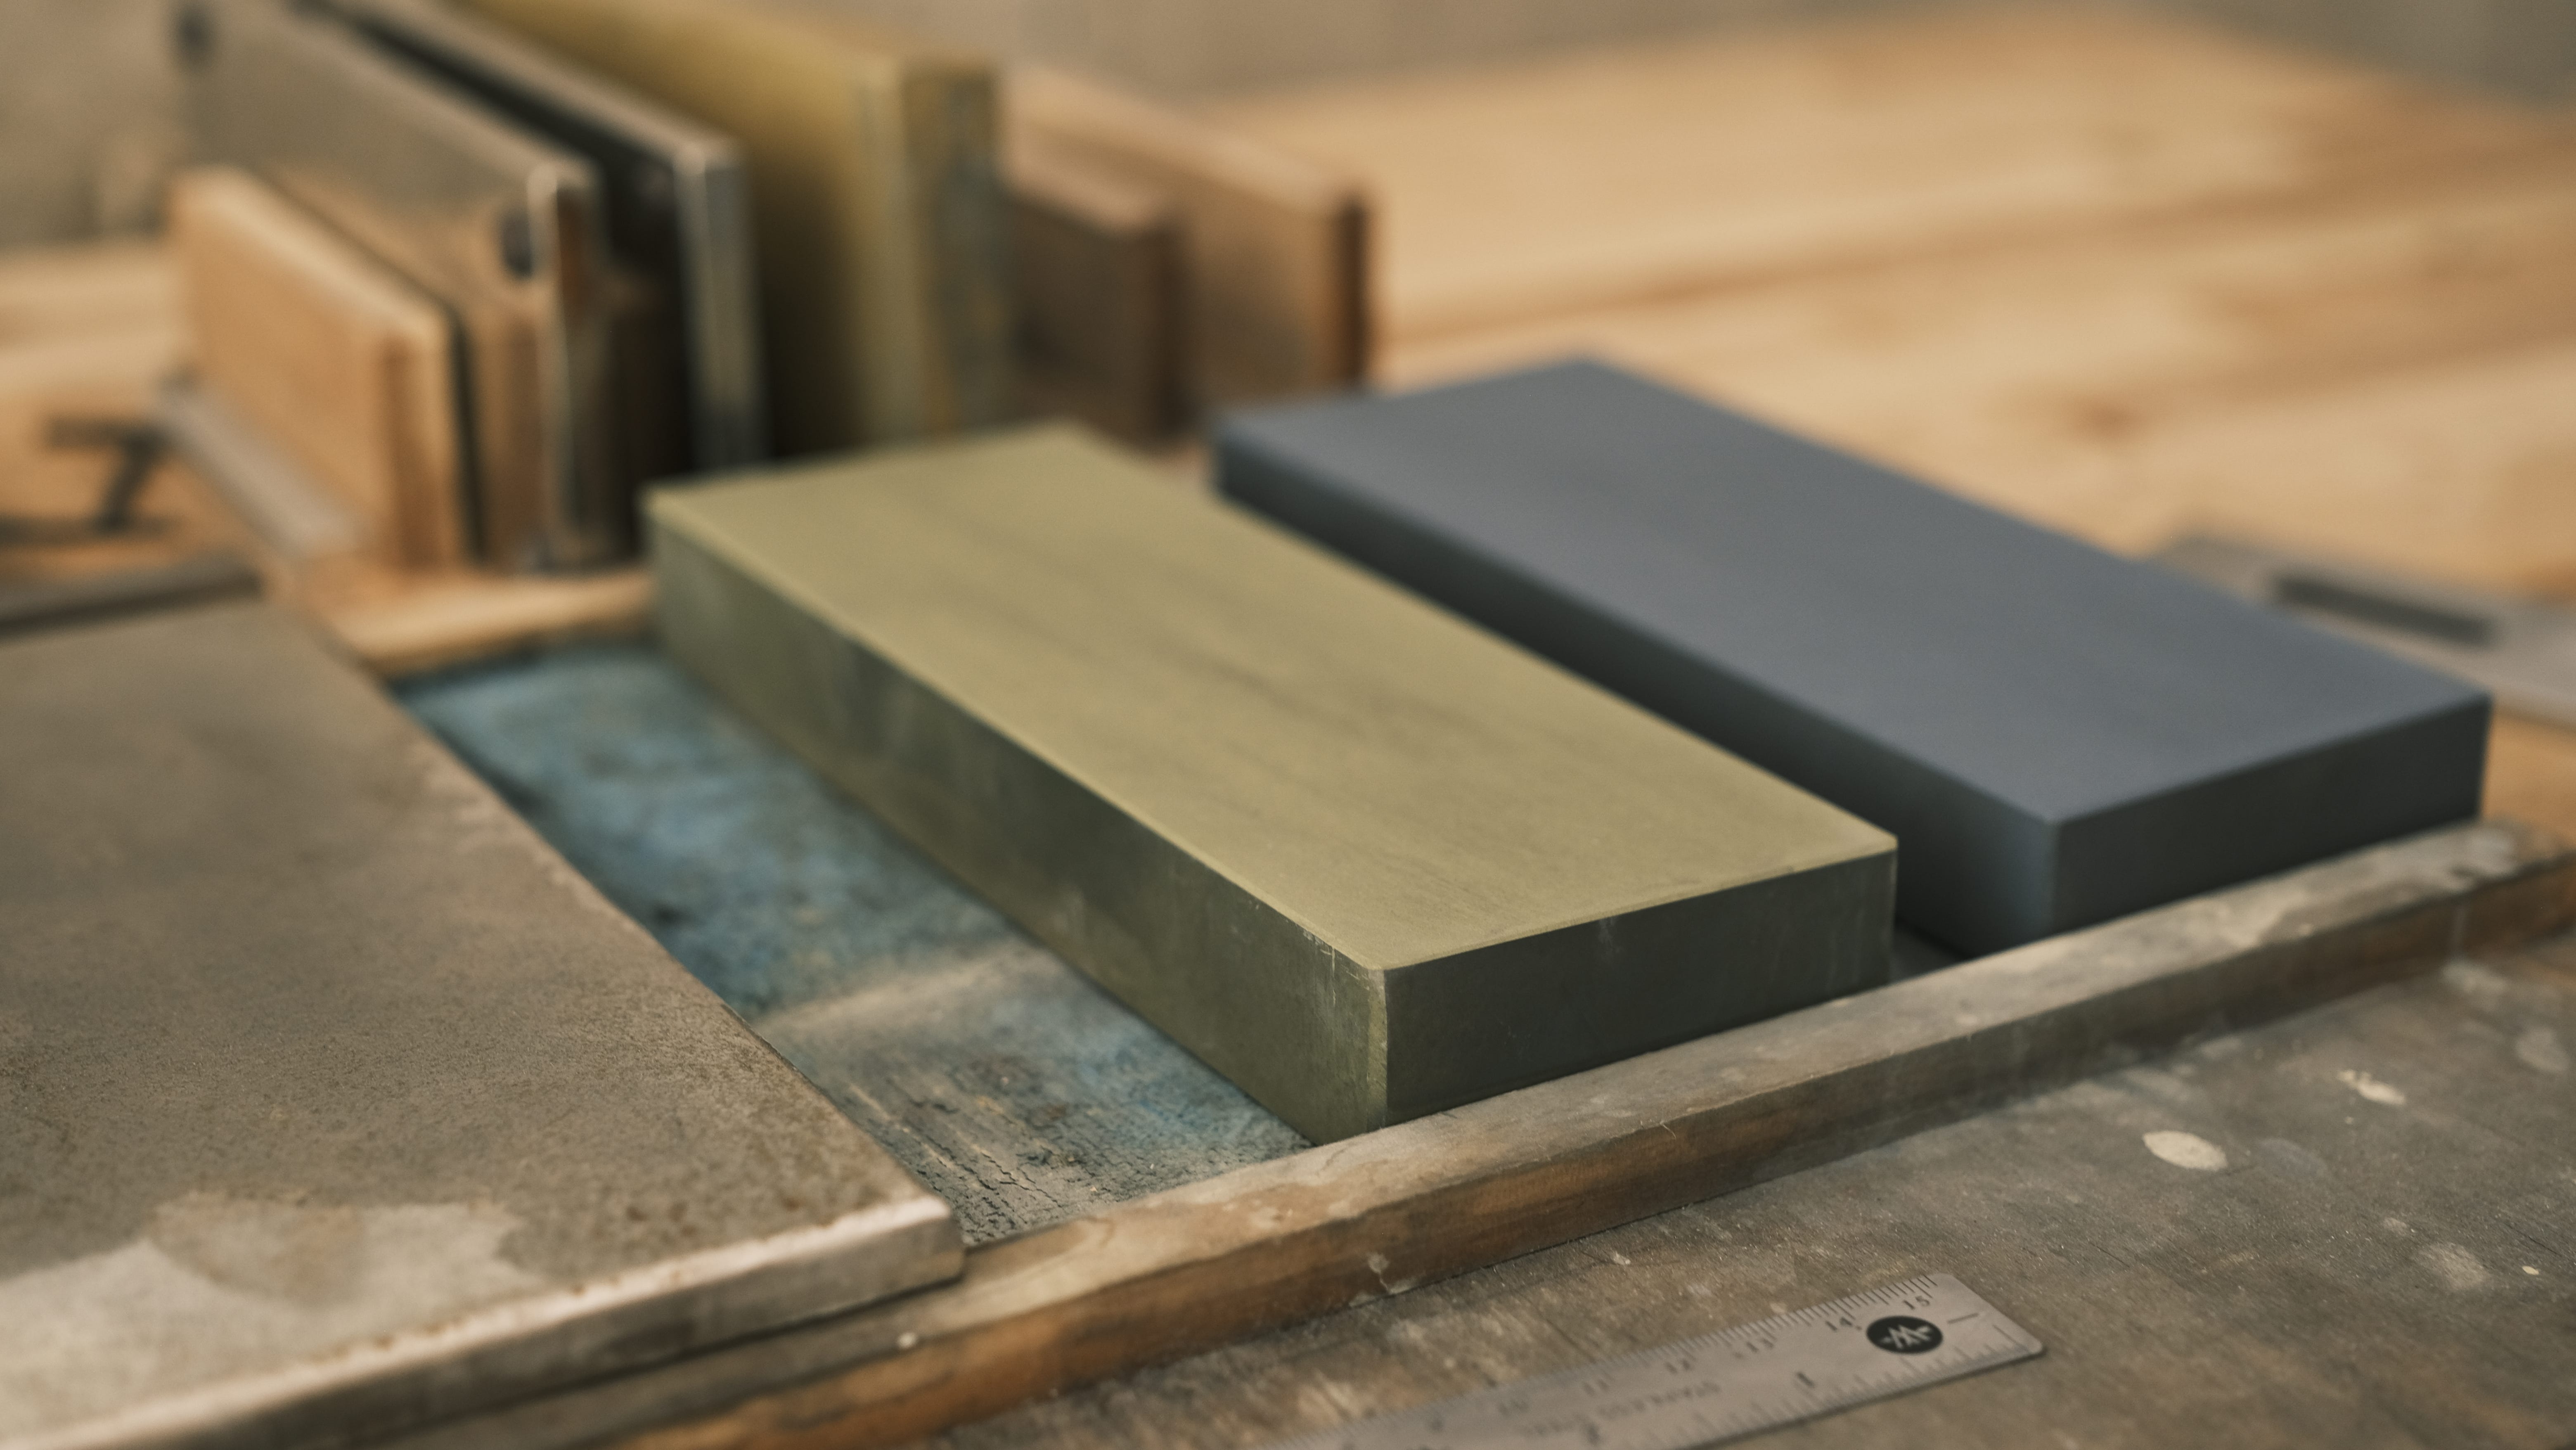
Oil Stones
Oil stones are very similar to water stones, except they are harder. My understanding is that the only real difference is the binder used to hold the abrasives together. The end result is a stone that is harder wearing but sharpens more slowly. At least that’s my understanding.
The big difference between the two comes in their use. Oil stones are used with… Wait for it… Oil! You can just use mineral oil with them, but there are lots of different inexpensive “honing” oils on the market to try.
Personally, I see oil as a much better fluid to use at a sharpening station, it’s less messy and the oil is more likely to provide protection than cause rust to form on my tools!
Just like water stones, oil stones also need to be flattened from time to time to maintain their effectiveness, but this is required less often.
Diamond Plate Sharpening
Using diamond plates for sharpening is another popular method. These plates consist of industrial diamonds bonded to a metal backing. They are known for their speed and the fact that they stay very flat - And never need flattening!
Getting a good set of diamond sharpening stones can get expensive, but in theory, they should last a long time. Perhaps the cost balances over time?
One great advantage is that, because they are so flat, they can be used to flatten other stones. Maybe it’s worth having one of these even if it isn’t for sharpening!
That's all the common sharpening systems covered so let's get to decision making. Wait… Something is missing!

Final Honing - Leather Strop
All of the sharpening systems discussed in this post will work to give a keen edge to your tools. But by adding a leather strop you'll get a razor sharp blade with a mirror finish! Sounds like a no brainer to me…
A strop is essentially just a piece of leather glued to a flat surface with the rough side up. It's used with a cutting compound to achieve a razor-sharp edge. They are cheap to buy, and even cheaper if you make one yourself with a piece of leather and scrap wood!
You often see YouTubers demonstrating this by shaving their arm hair on screen. Perhaps that is also how you spot keen woodworkers in the wild.
Rest assured, you won’t see me doing it…
Choosing a System
All of these systems function in the same way, they provide an abrasive surface for sharpening. To me, that means that it is purely down to personal preference, and with no experience, how could I possibly know which I will prefer?
That’s why I left it to the experts.
I mentioned in a previous post that I picked up some sharpening tips from Steve over at Tooltique. He explained his sharpening process to me in detail and said that all of the planes he restores are sharpened this way. From that conversation, I decided that the easiest way to get myself started was to follow in his footsteps.
So I bought myself a vintage Norton India oilstone, which has been flattened for coarse sharpening. I’ll follow this up with Welsh slate for fine sharpening. I bought both of these from Tooltique. I’ve also bought a leather strop for that mirror finish!
Here it is, The Woodworking Shed sharpening system!
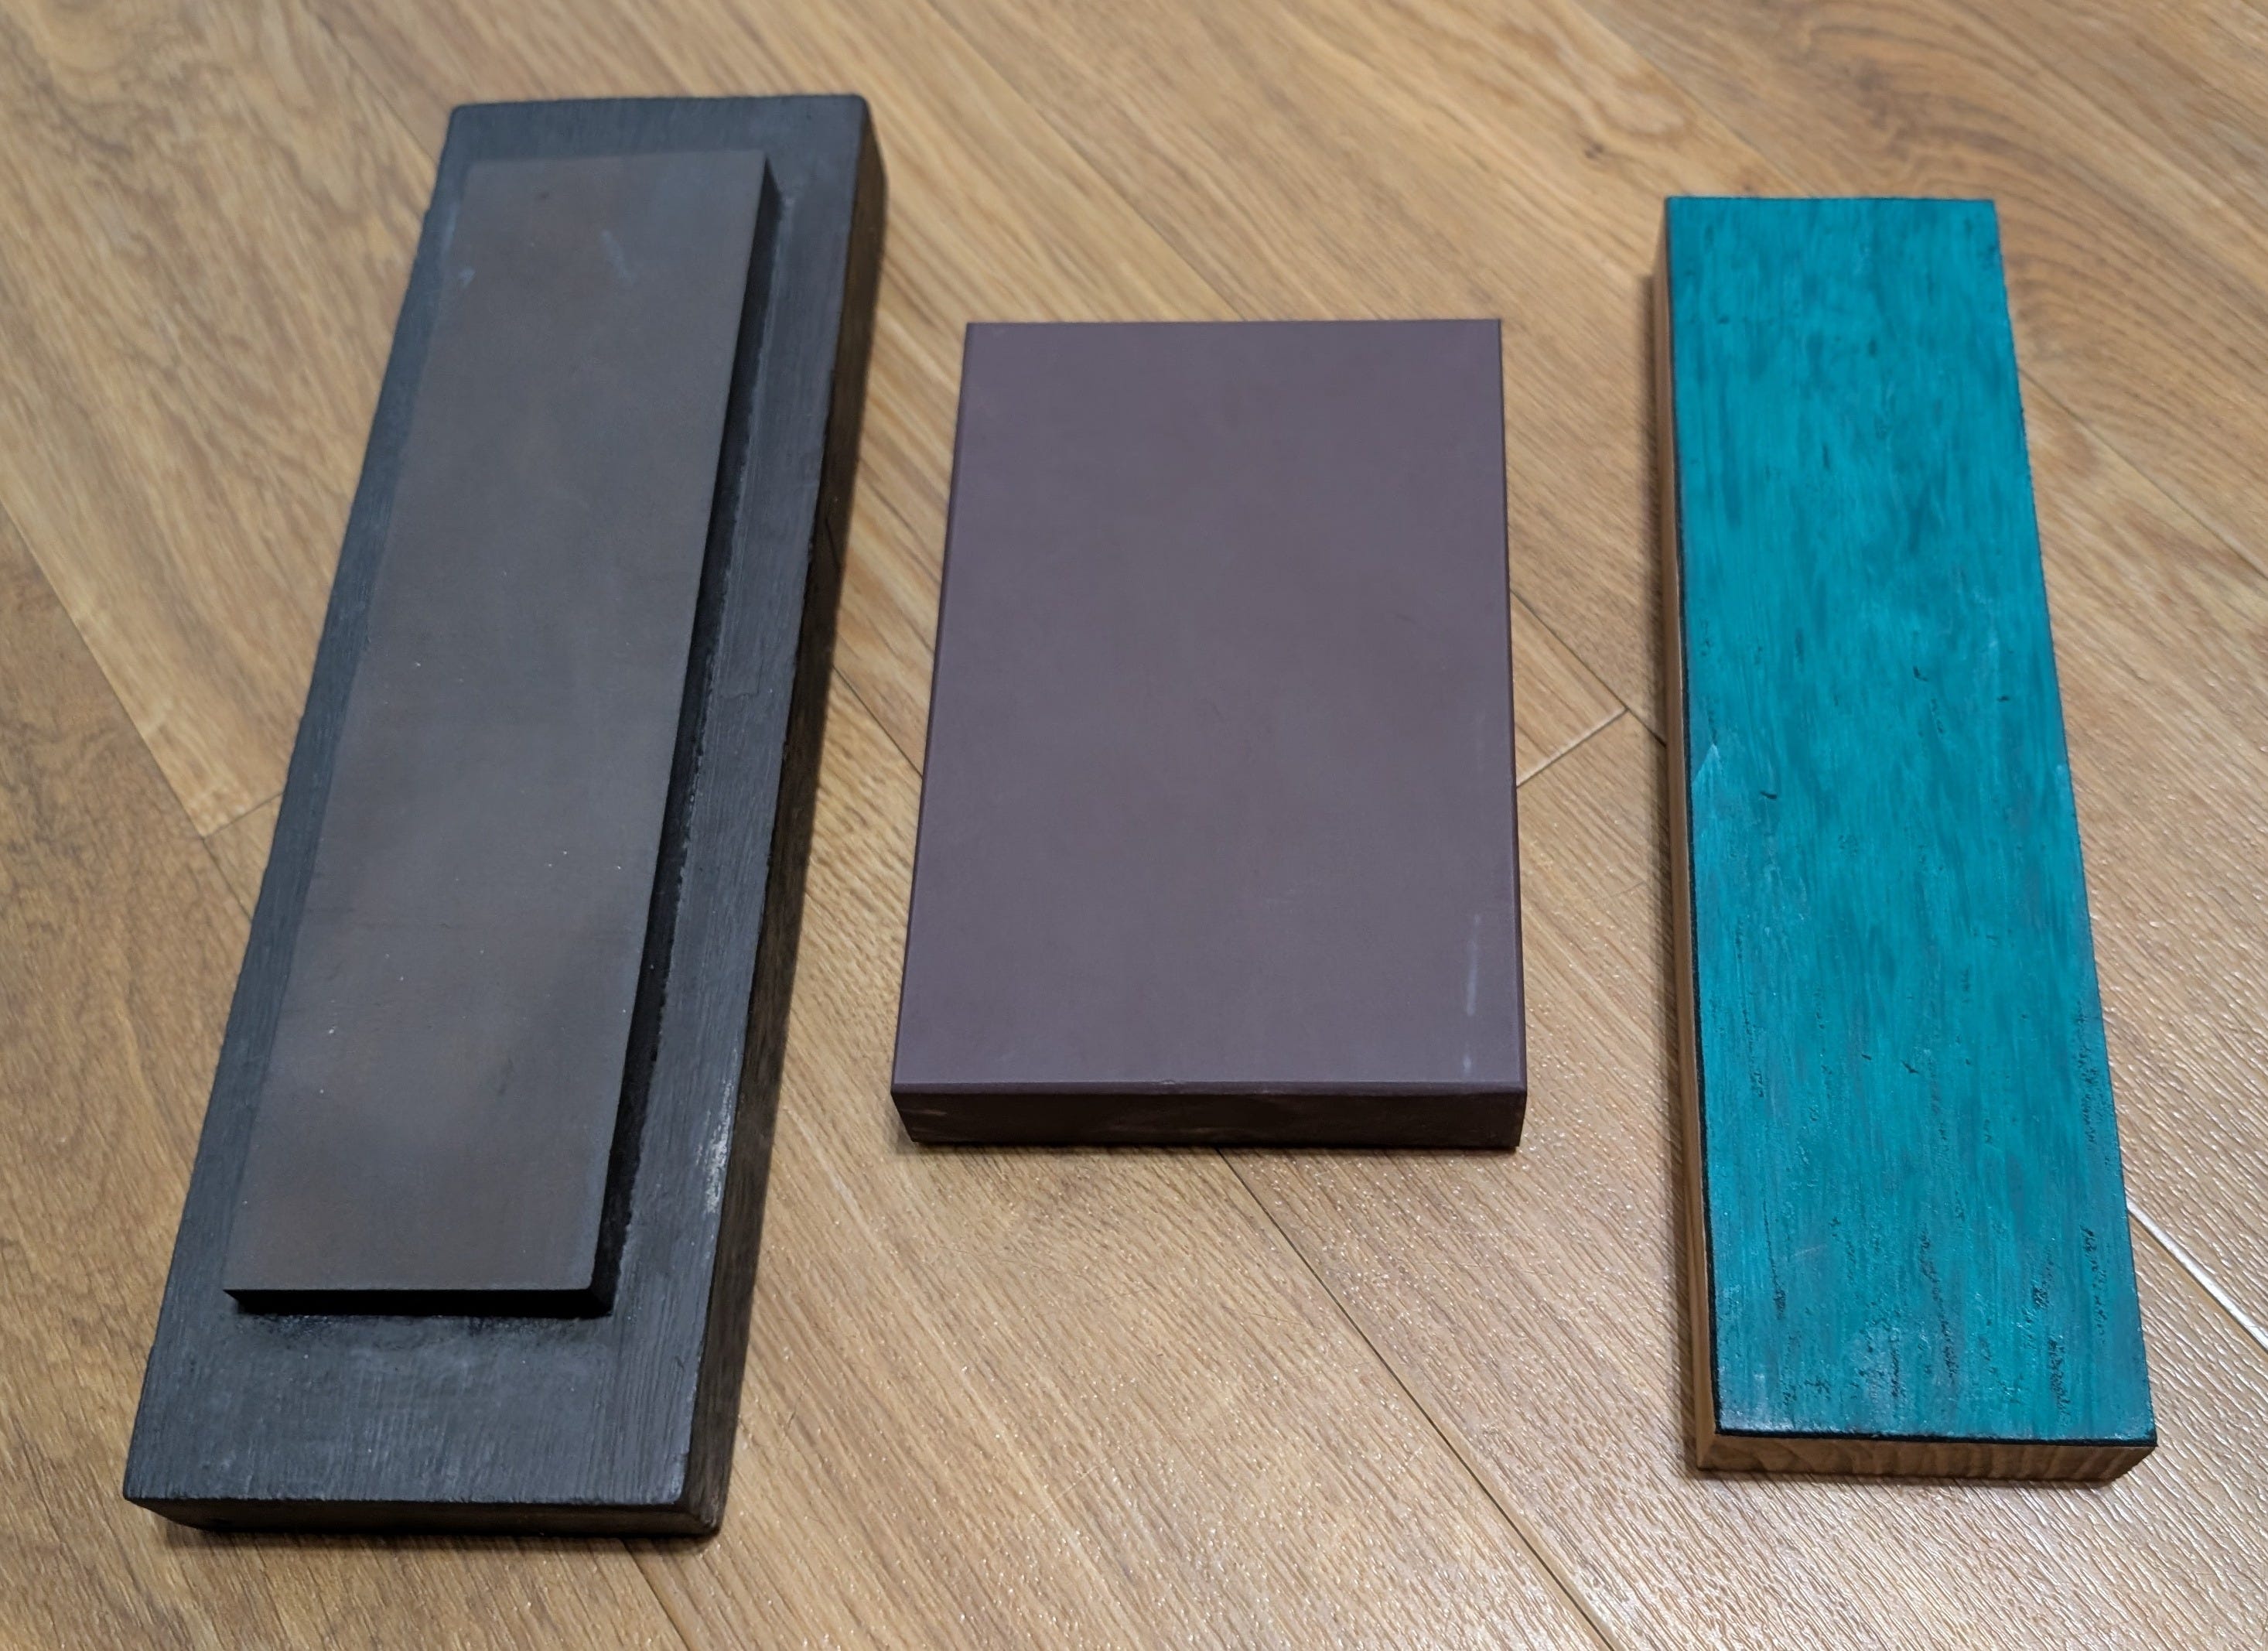
Keep it Sharp, Keep it Simple
I think this is a more traditional sharpening setup, which matches nicely with my interest in traditional hand tools. I'm confident that with these tools I'll have razor sharp edges in no time!
We all have to start somewhere, and I can't wait to give this system a try. If I find that this setup doesn’t work out, then I can always try something else!
I didn’t want to get dragged into the same scenario of overwhelming frustration that happened with buying bench planes. To use a term I picked up at work, I decided to K.I.S.S. it - Keep It Simple Stupid.
Which sharpening system do you use in your workshop? Let me know in the comments!
How You Can Help!
Just hitting that like button on my posts helps me to get The Woodworking Shed noticed!
If you'd truly like to support my mission to make woodworking more accessible, you can do so by becoming a paid subscriber or by buying me a coffee!
Early bird paid subscribers get 33% off forever!
Your support directly enables the growth of The Woodworking Shed and supports accessible woodworking!
Look forward to hearing from you -
~ The Woodworking Shed
Hungry for more?
Here’s the next episode!

Check out my other content. Head over to the homepage to find it all!

Oh no! Warning! Rabbit hole ahead! Religious discussions ahead! Political opinions ahead!
*** END SARCASM ***
Good setup. KISS is your friend. I've chosen the diamond stone method used by Paul Seller's and I'm going to stick with it until I find a reason not to. The snark above is a result of watching too many woodworkers try to become master bladesmiths. I'm a knife guy with over 400 blades in my collection. Get it razor sharp, but don't lose your soul to it.
It’s a good start you’ve made with sensible decisions. It’s not the same path I chose but there are many sharpening paths — and the key is to learn how to use yours effectively and keep with it.
You don’t mention it but I do suggest you get a sharpening guide—a “clamp on rollers” to maintain a consistent angle, and a jig to help set the angle. . It keeps the angle consistent and more importantly keeps the edge square. Sure people do it freehand. Yeah I used to. But I’m a lot more confident and consistent with a guide.