Building My Own: A Guest Post on Hand Plane Making
In this episode, we're joined by special guest Paul, an amateur woodworker who's going to show us his amazing DIY hand planes!
New to The Woodworking Shed? Don't worry! I've made a handy index page to find every episode in this series and more!
Special Guest in The Shed
Welcome back to The Woodworking Shed! This week, I'm doing something a little different and incredibly exciting – I'm handing over the reins for my first-ever guest post!
I'm thrilled to introduce you to Paul, a highly skilled amateur woodworker with a real passion for the craft.
Paul has created some truly impressive pieces and has a particular gift for making his own tools. He's very kindly offered to share his expertise with The Woodworking Shed community, and I couldn't be more excited to have him!
Today, Paul will be focusing on his incredible homemade bench planes. I know I'm eager to learn from him, so without further ado, I'll hand it over to Paul!
Introduction
Hey everyone, I’m Paul, and I like woodworking - almost exclusively with hand tools. I'm not a master; I have no formal woodworking training. I'm just a dude who's watched a bunch of YouTube videos and wanted to try it out. I’m still learning, and I always will be.
I believe that you should use the tools you have and the tools you enjoy. Space and noise are huge constraints for me, so I took the hand tool route.
You can find me online on Bluesky and Instagram!
I'm here to tell my story – I'm not big on giving advice. In fact, the only woodworking advice I really stand by is this: “Do what makes you happy.” There are too many over-opinionated jerks online who don't know what they're talking about.
I originally got into woodworking as a way to spend time and connect with my brother in a more positive way than just "slamming beers." He was going through a tough divorce at the time.
Around Christmas 2019, we started making a little hutch for my desk out of oak, which I'm still using to this day. It was a “hand tool” project, because, I guess, that was the "cool" thing on the internet then. I was just following along at that point.
One day, near the end of the project, my brother looked at me and said something like, “You know, I don't really enjoy working like this...”
But for me, it was the opposite – I couldn't get enough of it (plus I'd already bought and restored some tools!).
I found that woodworking with these basic tools was really fun and engaged my mind in a way that I think is good for me. It's almost like thinking with my hands, and it really helps my mental health.
I'm usually a super impatient person in just about everything else I do. Woodworking is the only thing that slows me down but in a really enjoyable way.
I'm pretty sure that when I make mistakes, it's because I'm rushing.
Why make my own planes?
Well, I'm also pretty cheap, and my wife would kill me if I bought any more tools, so I've tried to do this hobby as cheaply as possible. This kind of leads into why I decided to make some of my own hand planes.
I had a pretty basic but functional kit of restored Stanley bench planes that I used, but I was having trouble with tear-out.
Here's a little side story:
During COVID, my brother and I scored a huge bunch of lumber really cheap. A lot of it was slabs of American black cherry, which is absolutely gorgeous. The rest were really warped white oak boards. I suspect that the white oak tree was young when they cut it down because this particular oak had tons of reversing grain. This gets me back to why I wanted high-angle planes – as a way to deal with some troublesome spots in the wood.
At the time, buying more tools didn't seem feasible, and I wanted to try making some tools myself. I just thought it would be fun. So, I basically set out to make a high-angle plane. I think it's somewhere around 55 degrees, between a number 4 and 5. My very first plane was a prototype that I was very proud of at the time, even though I kind of hate it now.
I'm glad that I decided to keep making more planes, or more of the same thing to be honest. Each time refining it and doing it with a similar system so that they started to look more like they came from the same family of tools.
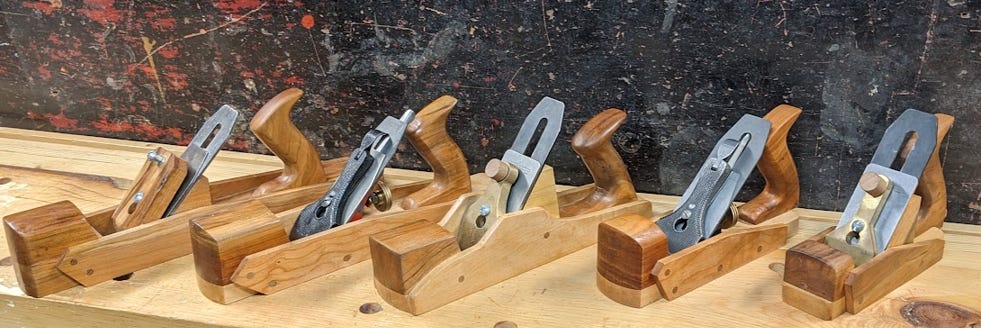
Although I have cast iron Stanley Bailey planes, I don’t feel my wooden planes are redundant. Sometimes it’s nice to have something that is lighter and less fatiguing, especially if I need to remove a lot of material. My foreplanes are wood; I don’t need or want any metal ones.
Building stuff…
I’m terrible at planning ahead, so I’ve never really used plans (except for my workbench) or drawn any of my ideas before starting a project. I feel that hand tools kind of lend themselves to this freedom. I just start working on making something I see in my head, or what I’ve seen others do.
My planes are very heavily inspired by the Marples Prefabricated hand planes, re-popularized by my heroes Rex Krueger and Paul Sellers (my third hero is
).I’m a visual person, so the closest I get to making plans is just looking at the thing I want to make over and over again, or watching videos of someone making it. I’ve probably watched these two videos a bajillion times:
Rex Krueger - Build an Adjustable Jointer Plane! // Affordable handtool woodworking
Pask Makes - Make a Handmade Wooden Plane - Scrapwood Challenge ep34
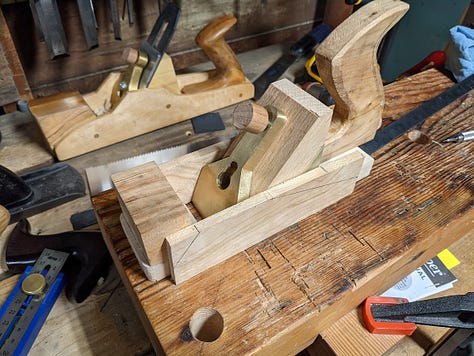
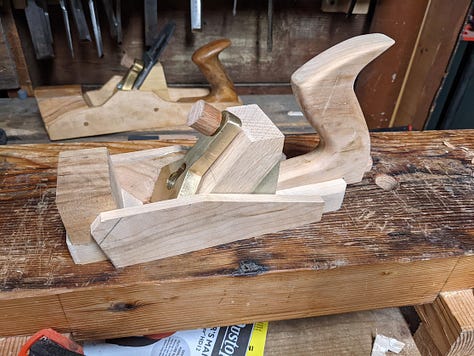
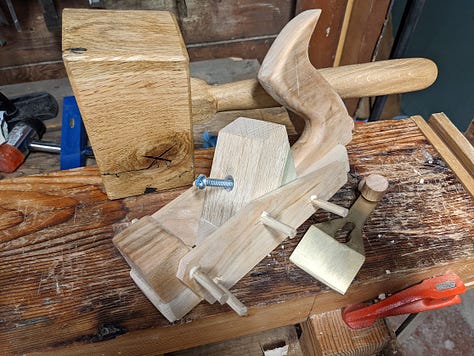
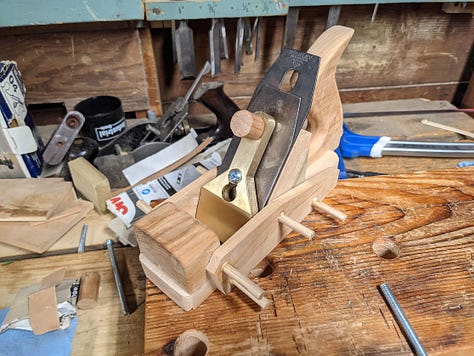
I usually start with the part I think is most fun first. It helps me get into a groove and get to work. I typically think of projects as a bunch of little parts. For these hand planes, the parts in my mind are: the sole, the bed, the sides, the tote/front pad, the blade, and the lever/screw cap.
But how do we get here?
Usually, your materials and tools will dictate your steps. Take a look at the stock you plan to build with. For some of my planes, I just had scrap firewood, basically, and for others, I had materials from the big-box store. Specifically, I used big-box "maple" for the soles of most of my planes.
For the planes that were just firewood, I needed to get the wood nice and square so that layout lines would be accurate and mark up nicely. For example, if your stock isn’t square and you try to scribe 90-degree angles all around, your final line won’t match your starting line.
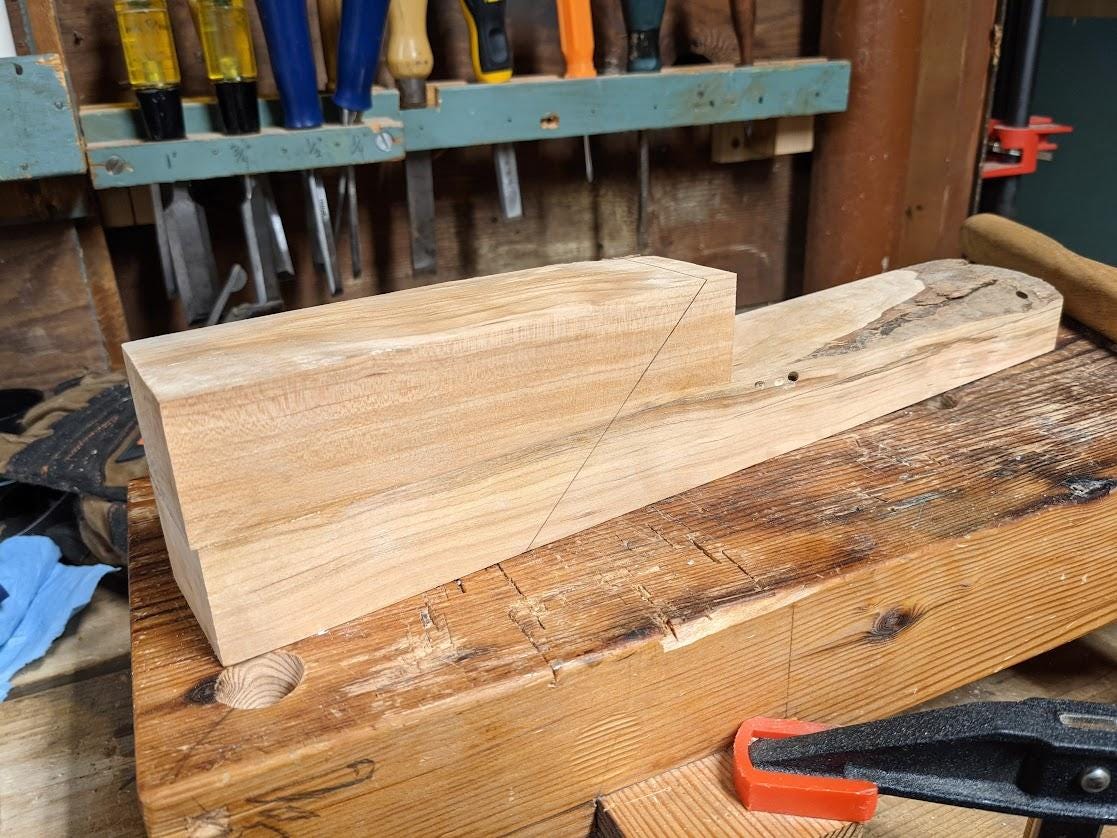
During the building and assembly of a hand plane, some areas require much more attention to detail than others. I’d say the most important thing is having a consistent bed angle, and the surface of that bed needs to be well-prepared and very flat. The better you do this, the better your plane will perform.
The second part that needs to be accurate is the sole. A plane won't work well unless the sole is flat, but just like metal planes, you can lap the bottom of a wooden plane flat. So, I think the bed angle is probably the most important part to get right before you progress through your project.
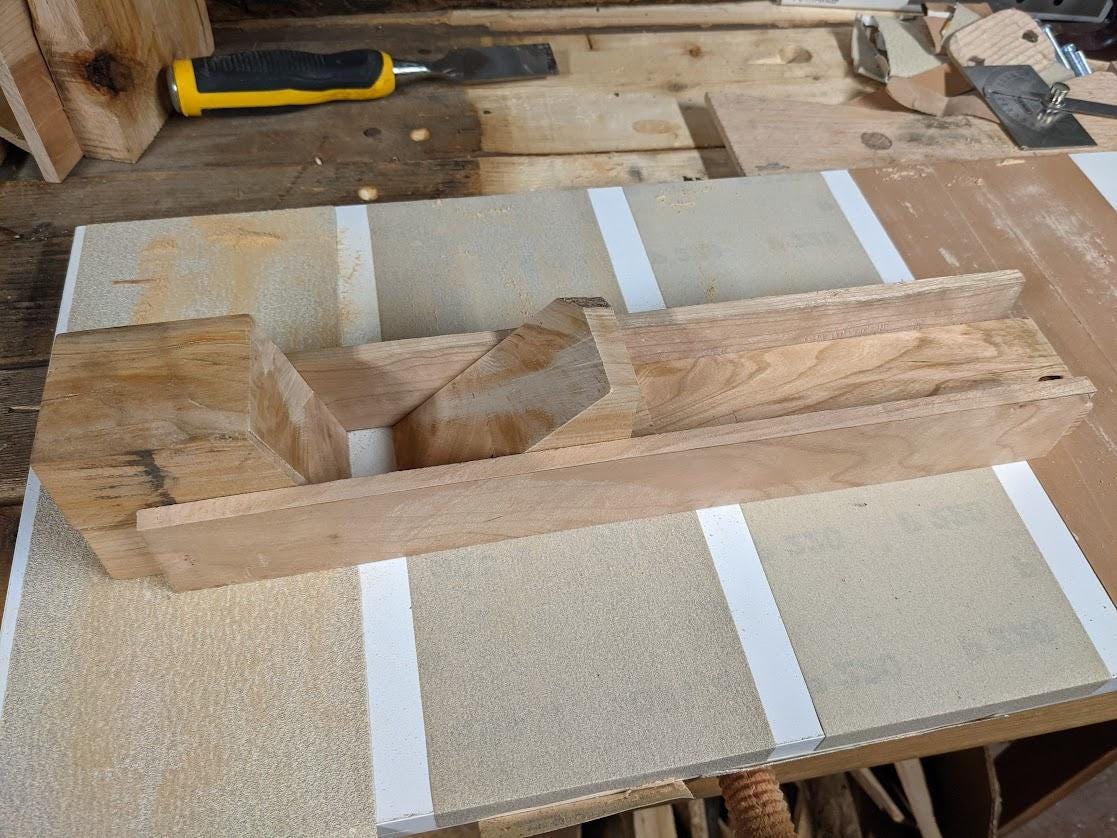
The sole of the plane will have to be flattened periodically. My experience with my wooden planes is that in the first year they're built, I had to flatten them maybe two or three times. But each subsequent year, I need to flatten them less and less as the wood stabilizes even more in its new shape.
Other details that aren't as crucial to the performance and function of the plane, but totally matter for comfort (and of course, appearances) are your tote and your front knob/front pad. I think with these parts, it's a combination of material selection – finding something that looks nice – and being able to execute certain shapes in beautiful but functional ways.
My first-hand plane's tote looks embarrassingly phallic. At first, I was very proud of this plane. But looking at it later, I realized that I really needed to learn how to make handles/totes - so I practised.
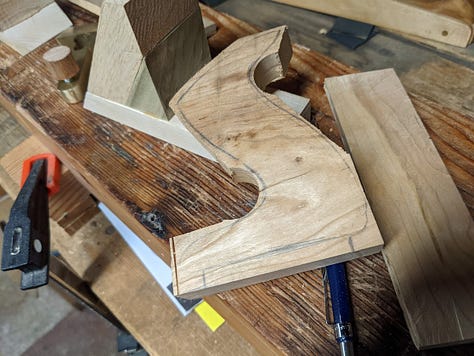
I took handles from hand planes that I liked and traced them. I also watched more videos on people making good handles. I'd say that each plane tote I've made has gotten better. I think iterating on the same thing has been one of the most helpful and useful tactics for my woodworking journey in terms of building skills.
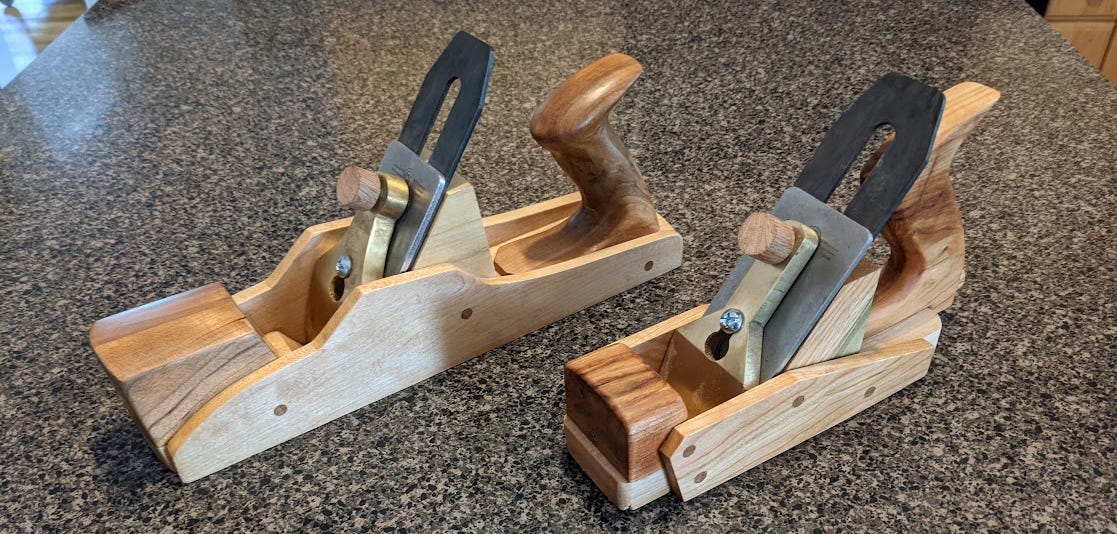
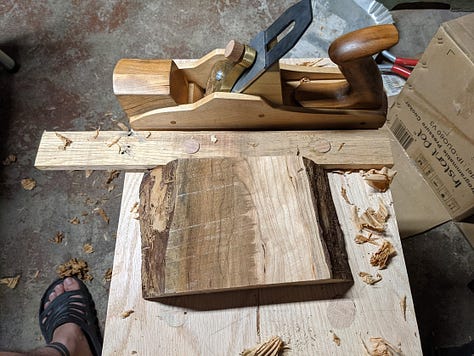
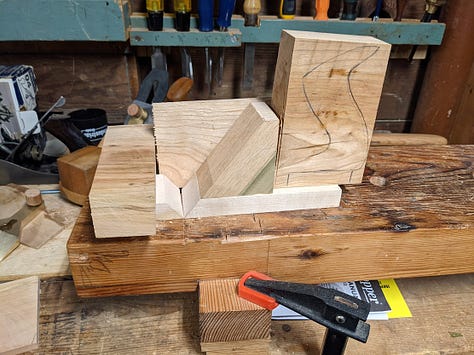
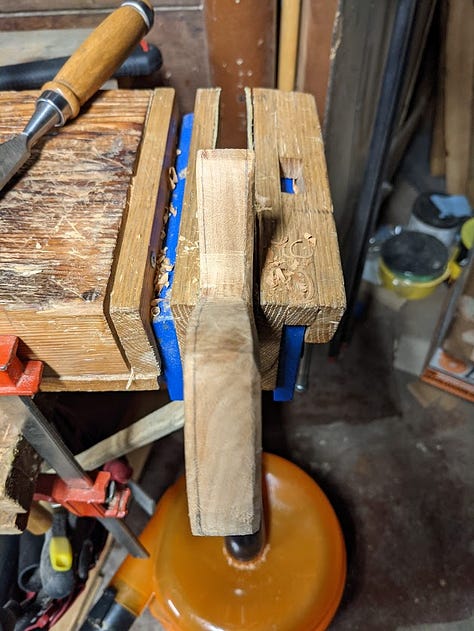
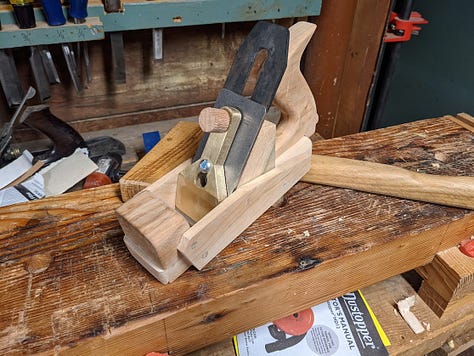
For the more visually oriented folks, here’s my most photographed build progression, and probably some glamour shots at the end.
Cheers,
Paul
DIY Plane Build Photos
Back to The Shed
Wow, thanks so much, Paul!
That was a great write-up, and I’m sure a lot of people (myself included) will learn a lot from it. Thanks for dropping by The Woodworking Shed.
If you enjoyed this and you want to see more from Paul, make sure to check out his Bluesky and Instagram pages.
Want to feature in The Woodworking Shed?
I’m on the lookout for other woodworkers of all skill levels to feature in my publication. So, if you think that’s you, reach out and let’s talk!
Enjoy this episode? Why not share it?
I want to build The Woodworking Shed into a strong engaging community. So if you know someone else who may enjoy it too: Don’t let them miss out - Share it!
New to The Shed? Pull up a chair…
Subscribe now to stay updated on my shed transformation, tool discoveries, and woodworking projects. Don’t miss out!
Support the Shed!
You can support The Woodworking Shed by becoming a paid subscriber or by buying me a coffee for a one-time boost. Your contribution helps me to keep delivering great content and justify all these tools!
Got something to say? Join the conversation!
Have a question, a tip, or just want to say hello? Leave a comment below! I love hearing from my readers and building a strong community!
Look forward to hearing from you -
~ The Woodworking Shed
Hungry for more?
Check out my other content! Head over to the homepage to find it all!


