


Sawing Basics: My First Try
In this exciting step-by-step episode from The Woodworking Shed, I'm putting theory to the test and finally breaking out the Ryoba for my first-ever saw cuts!

New to The Woodworking Shed? Don't worry! I've made a handy index page to find every episode in this series and more!
Making the Cut
Welcome back to The Woodworking Shed!
This week I’m putting reading into practice! I’m sawing wood.
This is the first true step on my hand tool woodworking journey - So let's hope I don't embarrass myself too much!
I'm going to step through the process from a beginner’s perspective using what I have learned so if you’re a newbie too it can be used as a guide.
Let's go for it!
Got Wood..!?
…Sorry, couldn’t resist!
Not much of a sawing guide with nothing to cut…
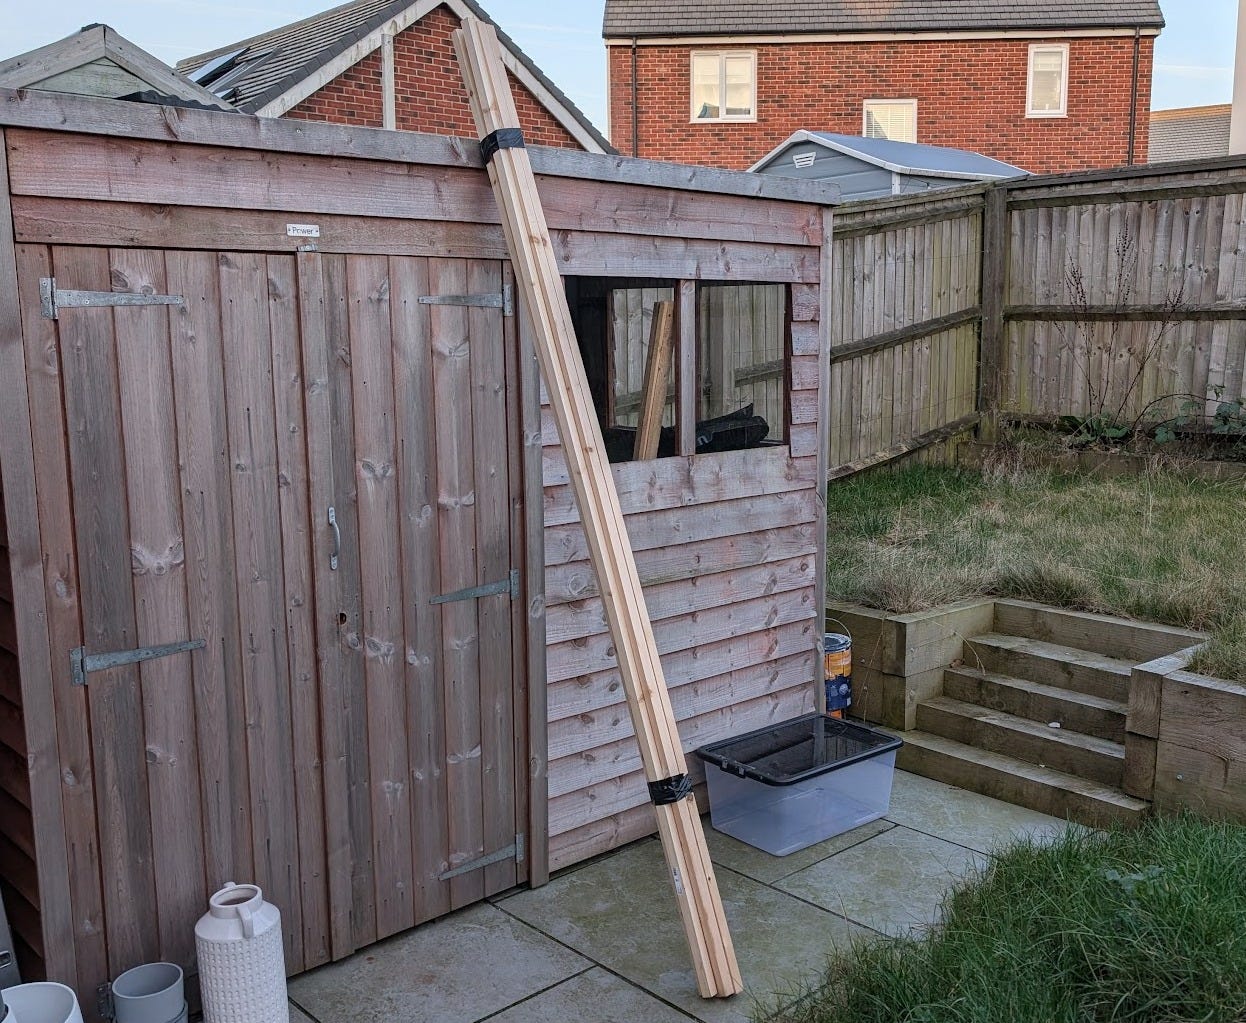
I've been working on my shed-to-workshop conversion and recently hit a snag… So I’m sawing with a purpose!
Want to know more about the snag? Check out this post!

Knowing where to cut…
Let’s talk about cutting lists…
If you’re planning a woodworking project, you should always create one. It helps you plan how much material you need to buy and avoids paying for delivery twice when you've guessed wrong! (That didn’t happen… I promise!)
So what is a cutting list?
It’s exactly what it says on the tin. It’s a list of the cuts that you need to make to prepare the material for the project.
To make one you just need to measure all of the areas you need the material. Better yet if you have a drawing, work it out from there!
Make sure to add a little bit to each measurement to give yourself some leeway - Especially if you plan to plane it down later.
You can see my cutting list for the shed framework pictured (No comments on my handwriting!).
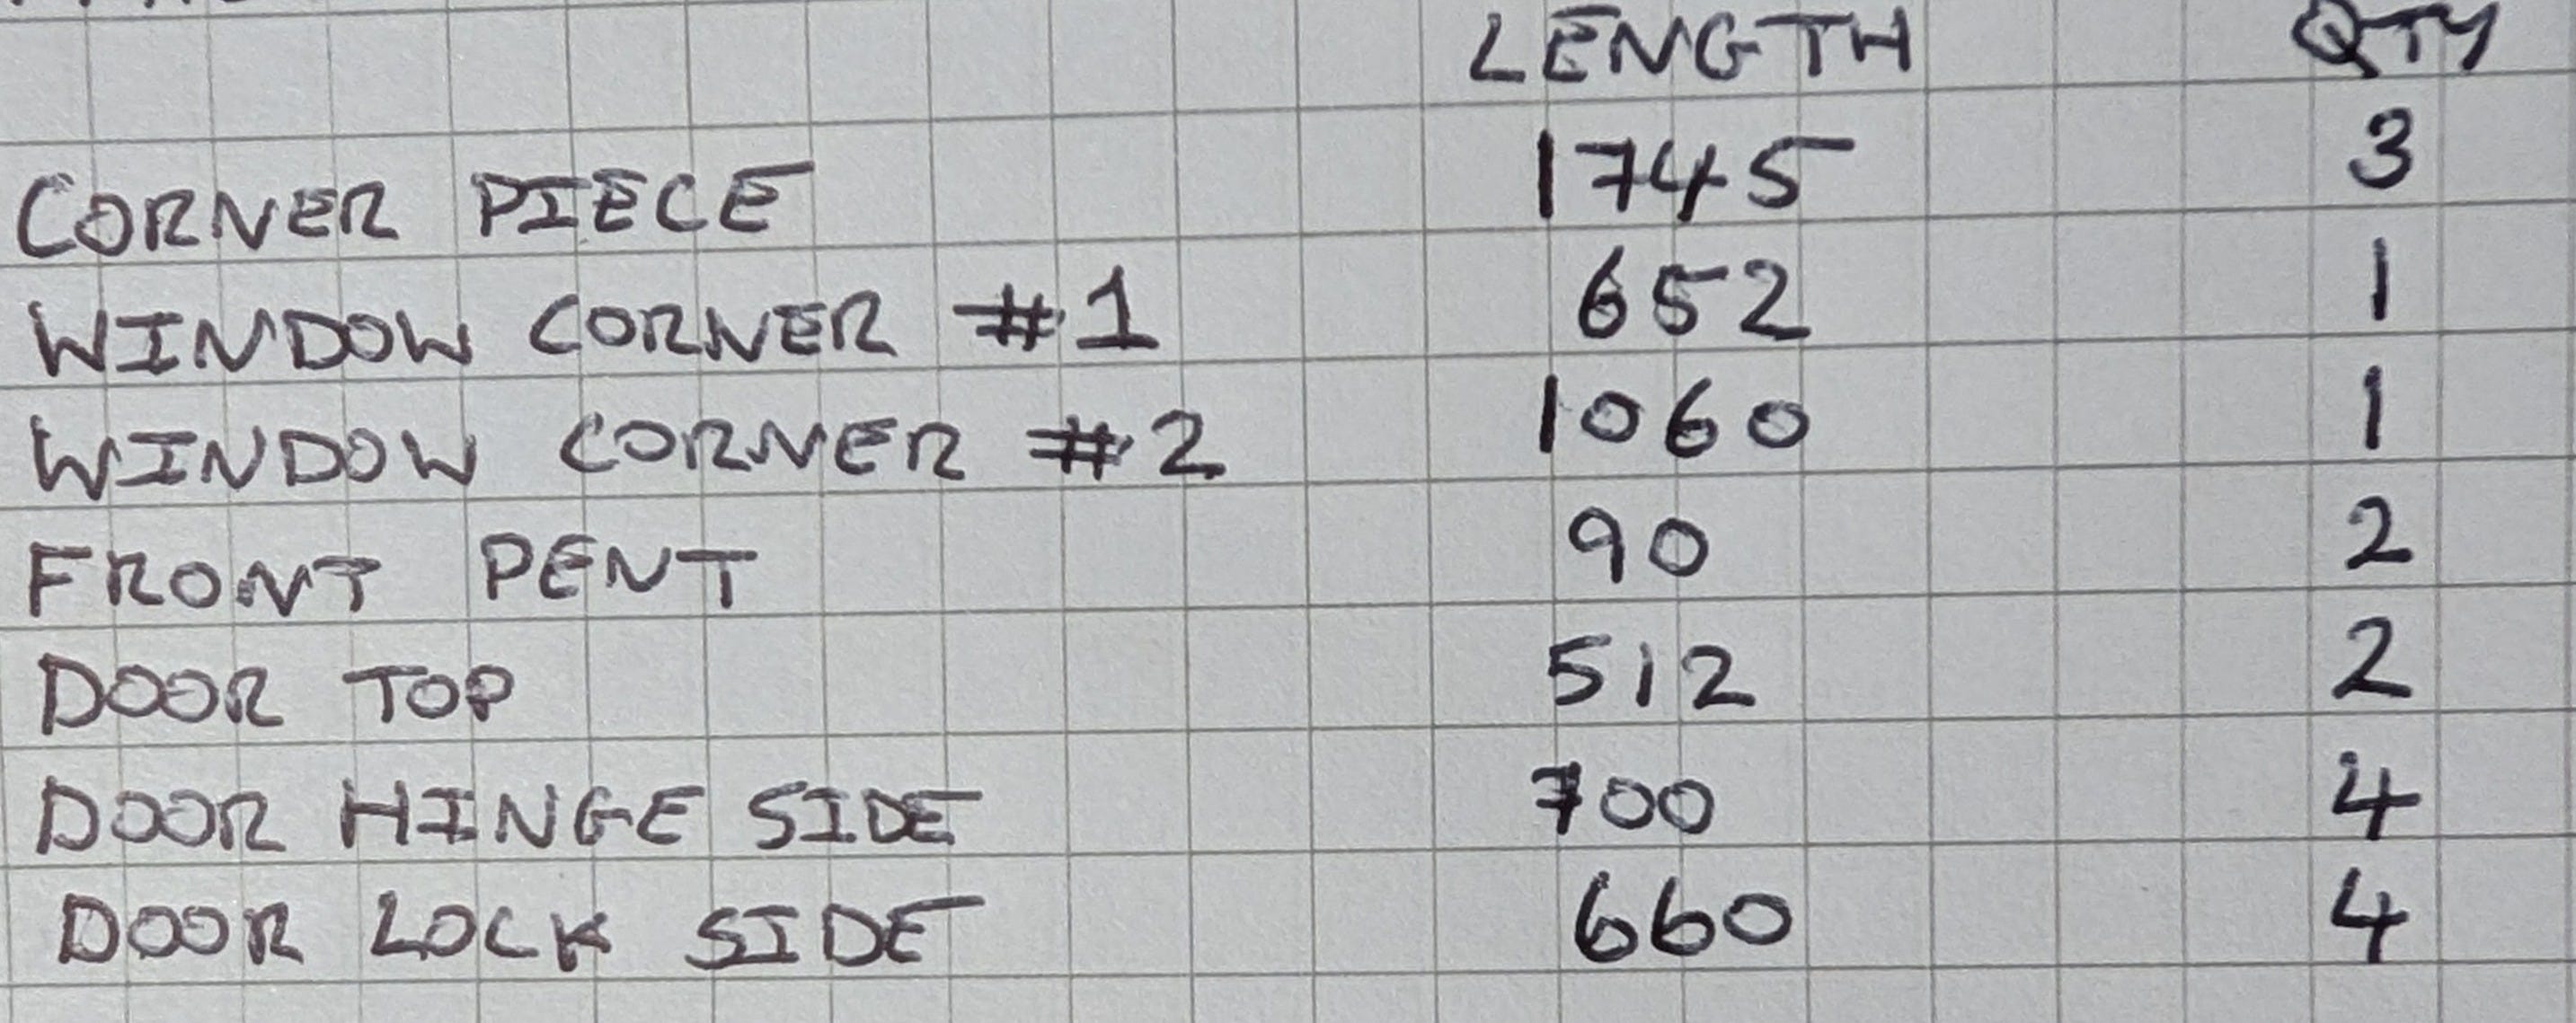
It was quick and easy to do, though I’m not sure how accurate the measurements are - It WAS pretty dark in the shed…
That’s my excuse and I’m sticking to it!
Once you have a cutting list you can easily calculate how much material you need by looking at the lengths of wood available to buy and mapping out how to make the most of that material.
Efficiency saves you money here.
Got any tips for an effective cutting list? I want to hear them!
Tools used
Right, tools… 1. Hacksaw, 2. String… hang on… We do things properly around here!
Here's a list of tools used in this episode:
Ryoba Saw
Combination Square
Tape Measure
Knife
Pencil
So now we know what to cut, where to cut, and what we need to cut with, the boring stuff is complete…
Let’s get chopping!
Measure Twice… Cut Once…
This is so important - If you measure too short and cut without checking. You either need a seat of the pants redesign or you’ve lost that piece.
Don’t risk it - Measure, then measure again!
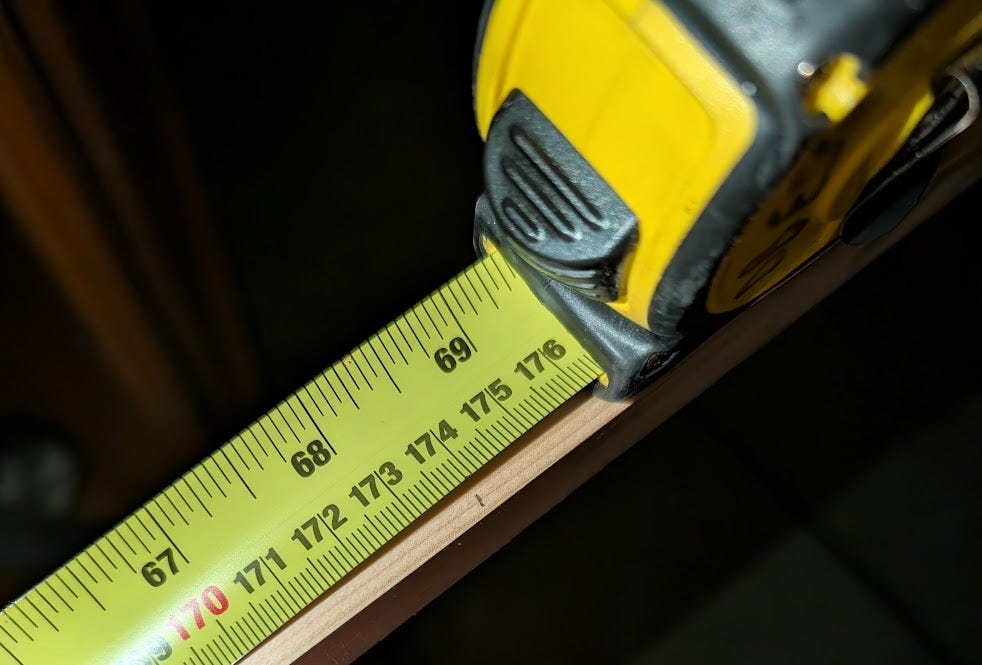
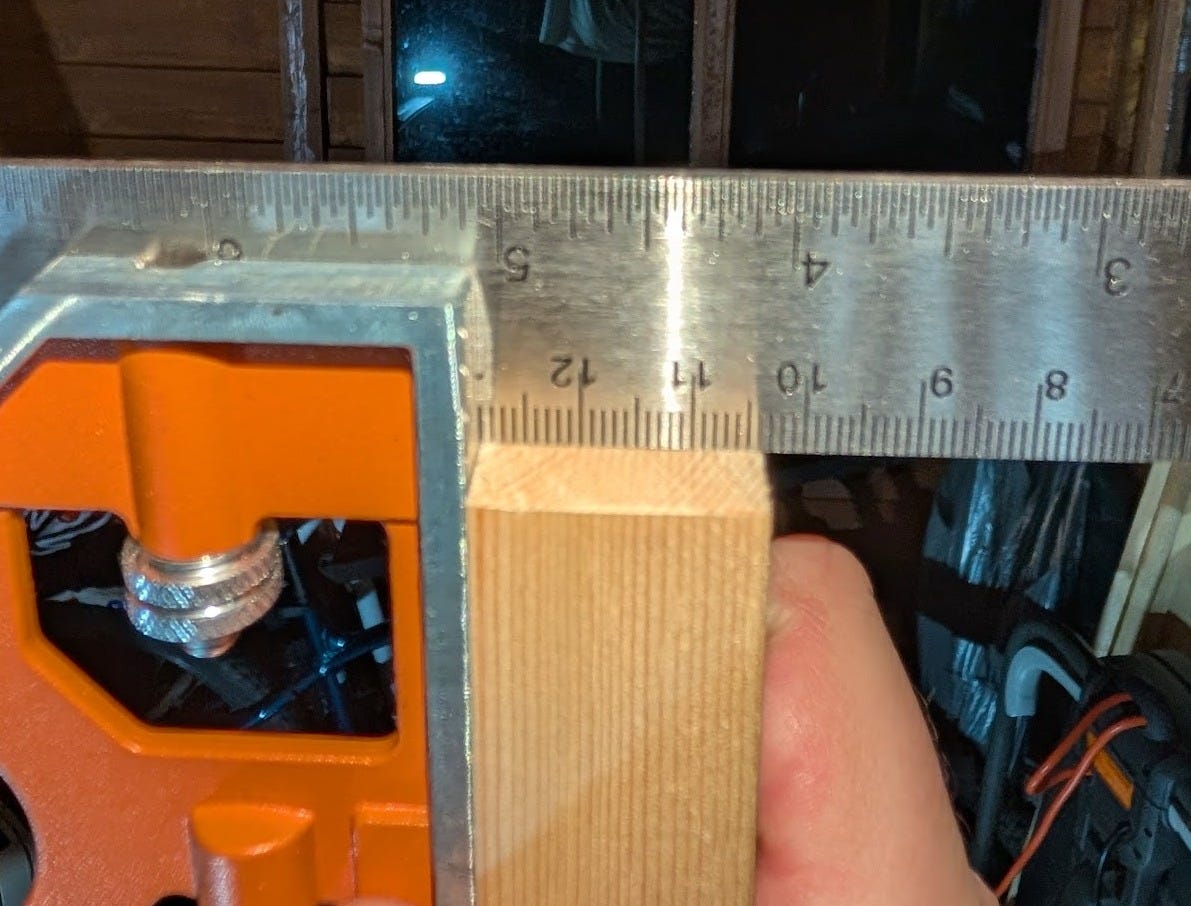
I’m measuring out to cut a piece 174cm long, so I’ve marked it out with my tape measure (And then checked it!).
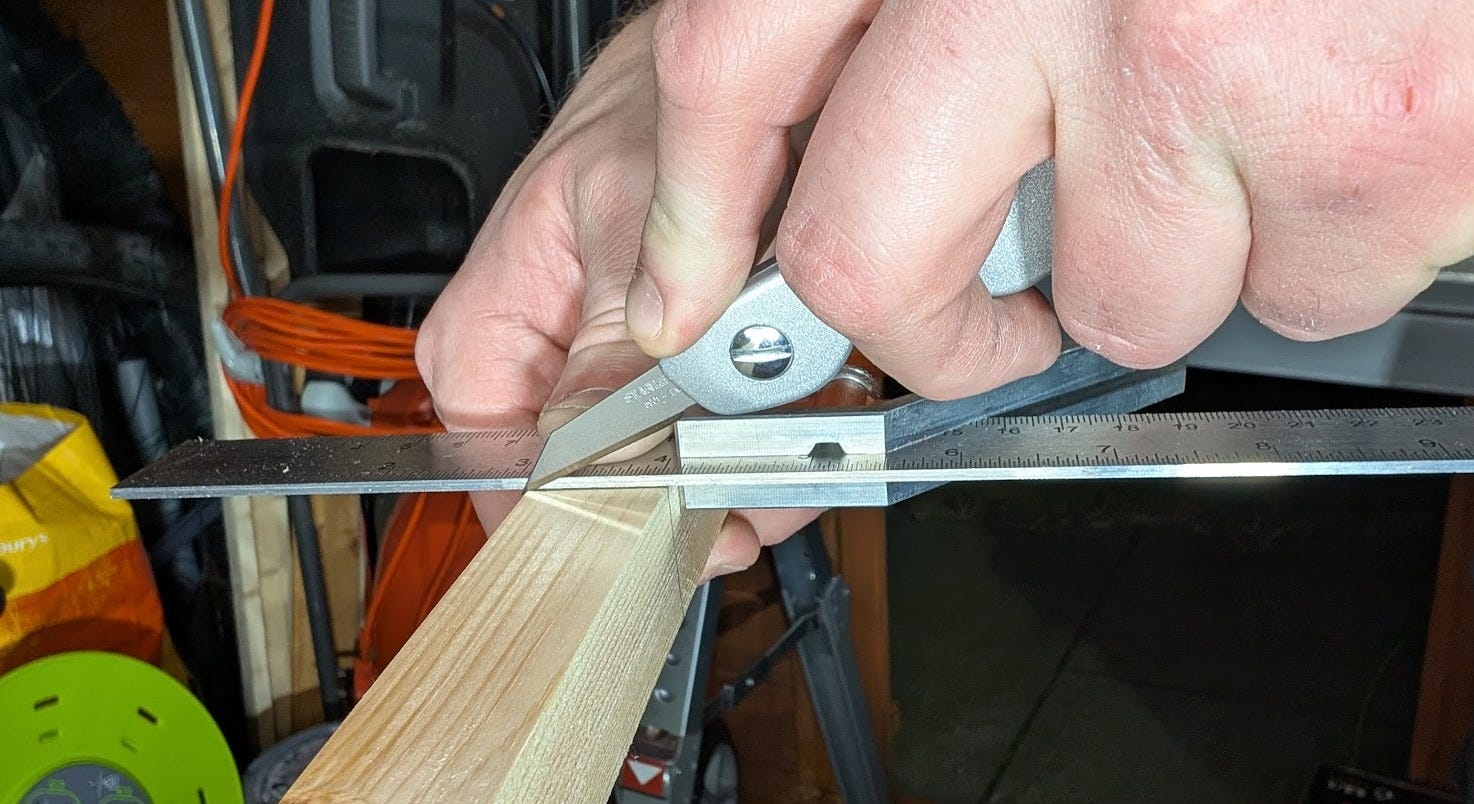
Next up, I’m marking my cut across the material using my combination square. You can use a set square or anything you know has a perfect 90 degree on it.

You should transfer this line down the sides of the piece too. Why? Because that’s how you’ll know if your saw cut has gone off track!
Tip: It’s a good idea to mark the wood on the “waste” side ( Something I forgot to do!). So you know which bit of the wood you want to keep! Pretty handy when sawing down the middle.
Marking out the cut on 3 faces is a beginner-friendly way to visualise the cut you need to make. However, it is optional and can be skipped when you are comfortable with the next step…
What’s your biggest measurement fail? I know you have one… Let’s laugh about it in the comments!
The Knife Wall Technique
Not a wall you want to climb.
The knife wall technique is supposed to help prevent tear-out by scoring the wood fibres ahead of the cut. Essentially, it creates a clean edge by cutting the fibres before they have a chance to tear.
Tear out is where the wood fibres get ripped out rather than cut. It’s what causes those ugly splintery edges and chipped ends… There’s a picture later.
I say that it’s supposed to do that because I’ve never tried it… Until now! The following images are from my first-ever knife wall - You’ll have to wait till later to know if it worked or not!
Let’s give it a try…
Using a knife against my combination square I’m scoring firmly over my pencil line.
Tip: Roll the knife over the edge of the material to transfer the line onto the next face.
This technique needs to be done around all four faces of the material to work properly!
Once that’s done it’s time to make the cut…
Breaking Out The Ryoba
This is exciting… The first outing of my new saw. The Ryoba! The perfect opportunity to make a fool of myself!
I need to make sure I’m using the right side of this double-sided sawing machine. I’m not too sure what will happen if I get it wrong but I’m not willing to find out today!
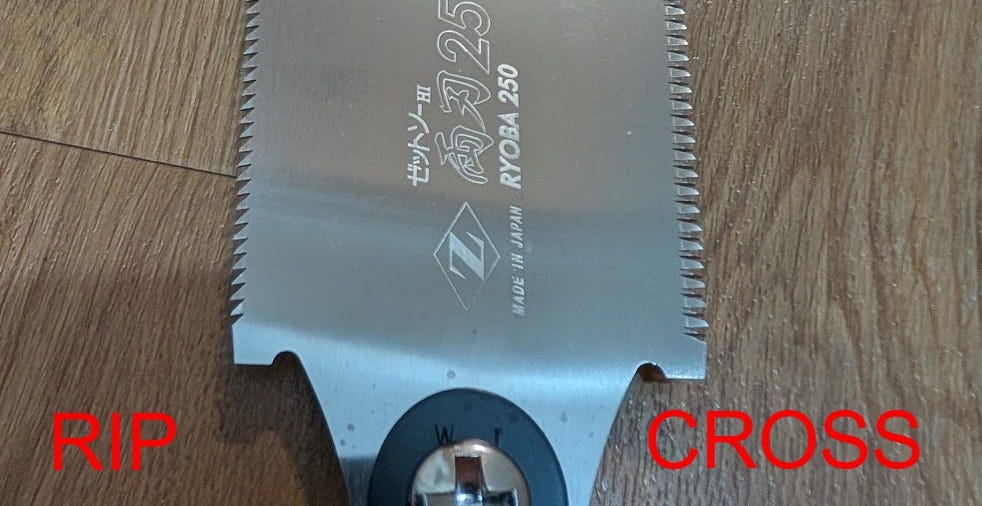
I’m cutting across the grain here so I need the crosscut teeth. You can see the difference in the picture above. I may have to mark the saw with a Sharpie for quick reference!
Here we go… sawing time…
First, I line up the saw with my knife wall - Hold my breath - And start my cut.
I started out by making a full stroke of the saw keeping the teeth flat across the whole width of the material. I used the tips of my fingers as a saw guide too.
Tip: Saw with your elbow. Lock your wrist. The saw is an extension of your arm not your hand.
After this, I started to angle down. I kept going like this until I’d finished the cut.
Tip: Listen to the saw, the cutting sound changes massively when you’re almost through. This is your cue to slow down and support the material to ensure a clean cut!
I was a little nervous because I had always planned, for better or worse, to make this post using photos from my actual first attempt. This is real.
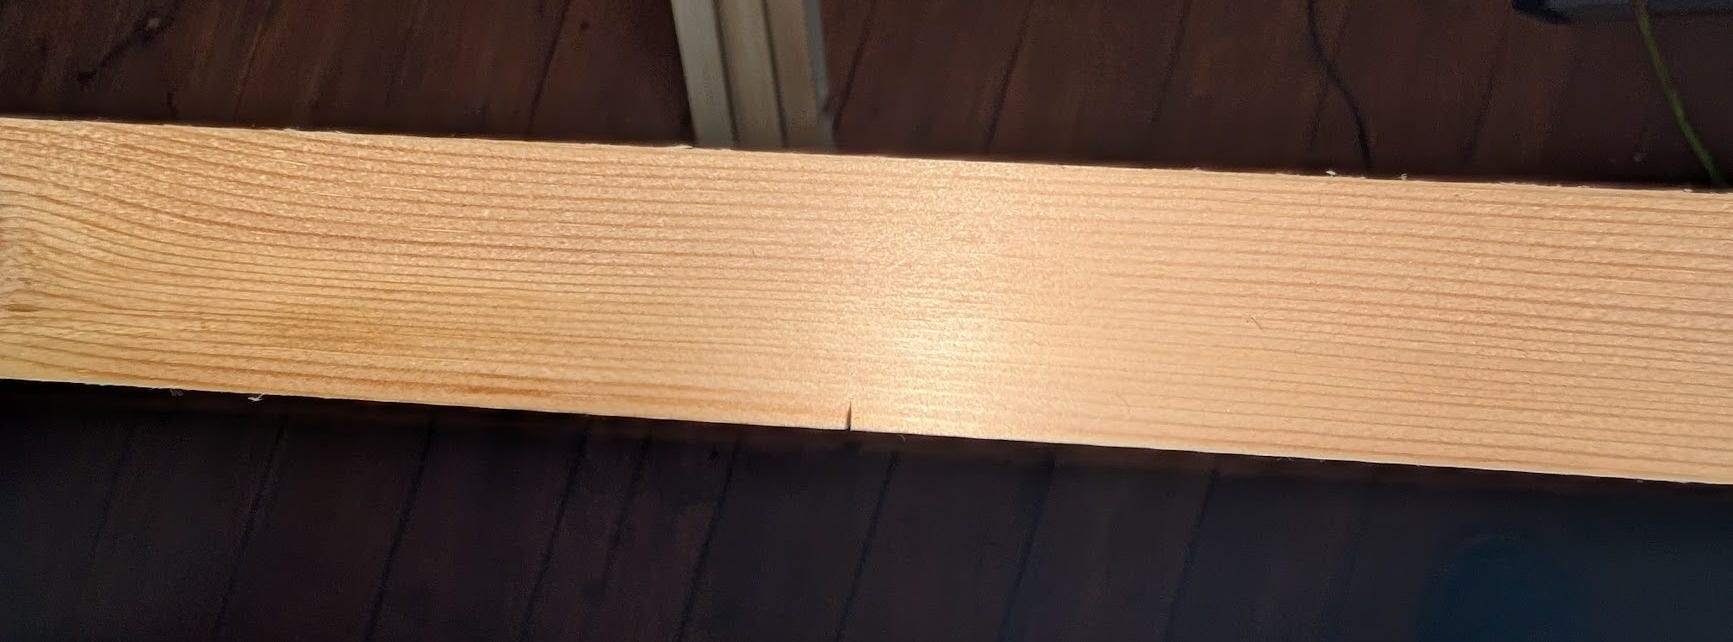
Regardless, I went straight to the combination square to see how I did. Much to my surprise - It’s SQUARE! At least close enough to be proud of it!
Look at that!
Talk about beginner’s luck…
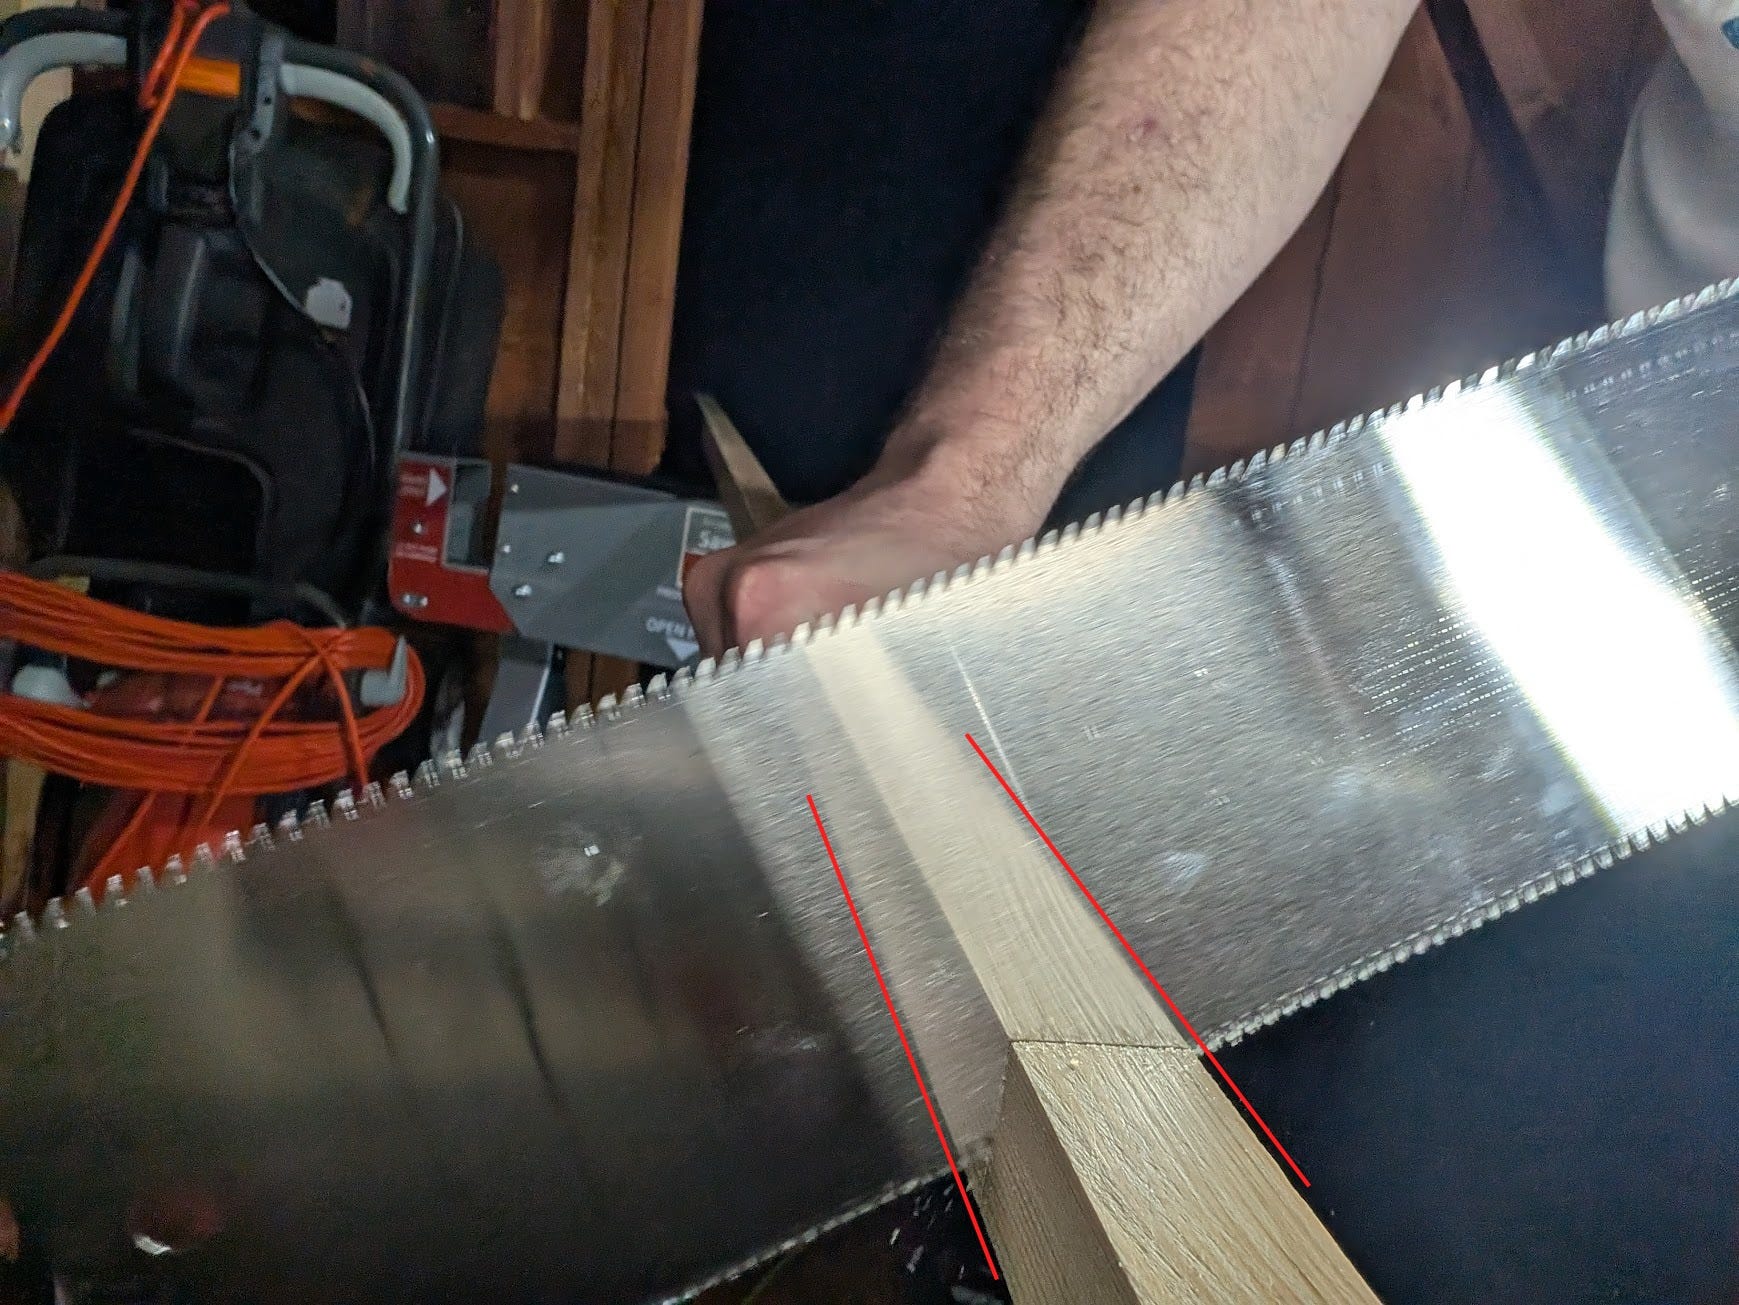
Cutting Square: Reflections
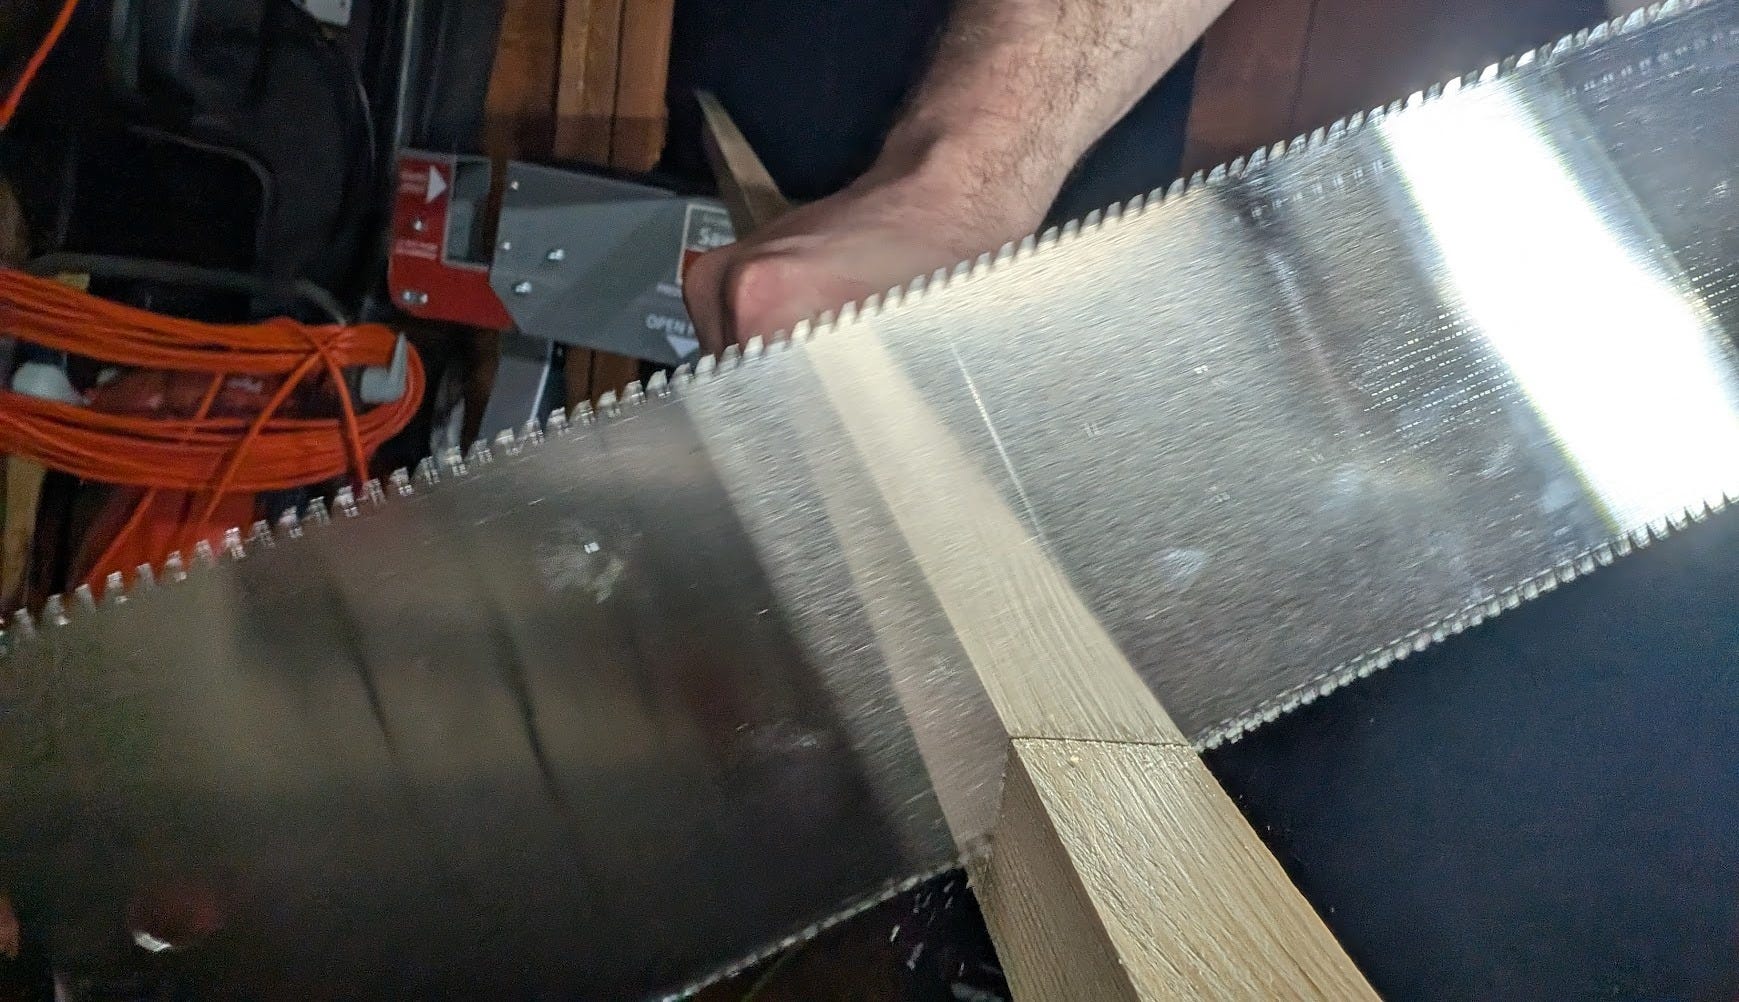
Let's talk more about cutting things square. See that lovely mirror finish on the saw? It’s your biggest ally.
When you place your saw on the material ready to cut. Just check that reflection. If the mirror effect looks like the wood goes off into infinity in a STRAIGHT line. You’re square.
I’ve added some lines to the action shot below to try and demonstrate this. The reflection looks like a continuation of the wood. and even lines up with the other side past my hand.
This simple trick will really boost your sawing skills. Try it!
Proving The Knife Wall
Right… Knife walls… Do they work?
On my second cut, I skipped it. I went straight from measuring to cutting and here is the result:
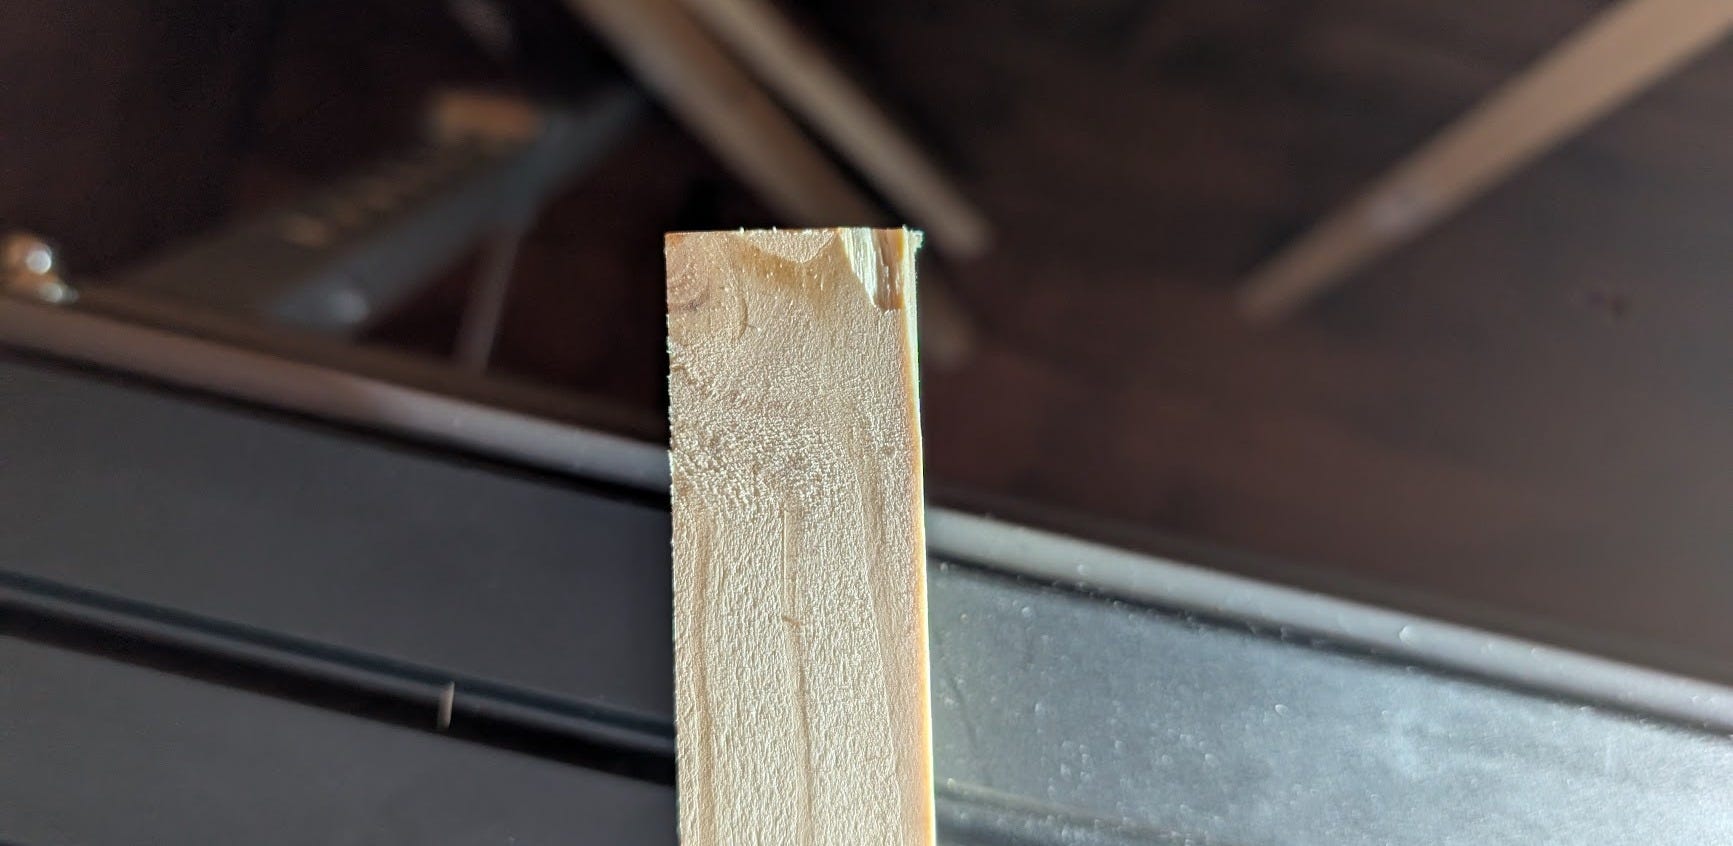
A huge chip tore off the end.
I used the exact same cutting technique the only difference was that I didn’t use a knife wall.
I had to try it - Put the technique to the test. I wanted to see if I was wasting my time. And now I know.
Use a knife wall - It works!
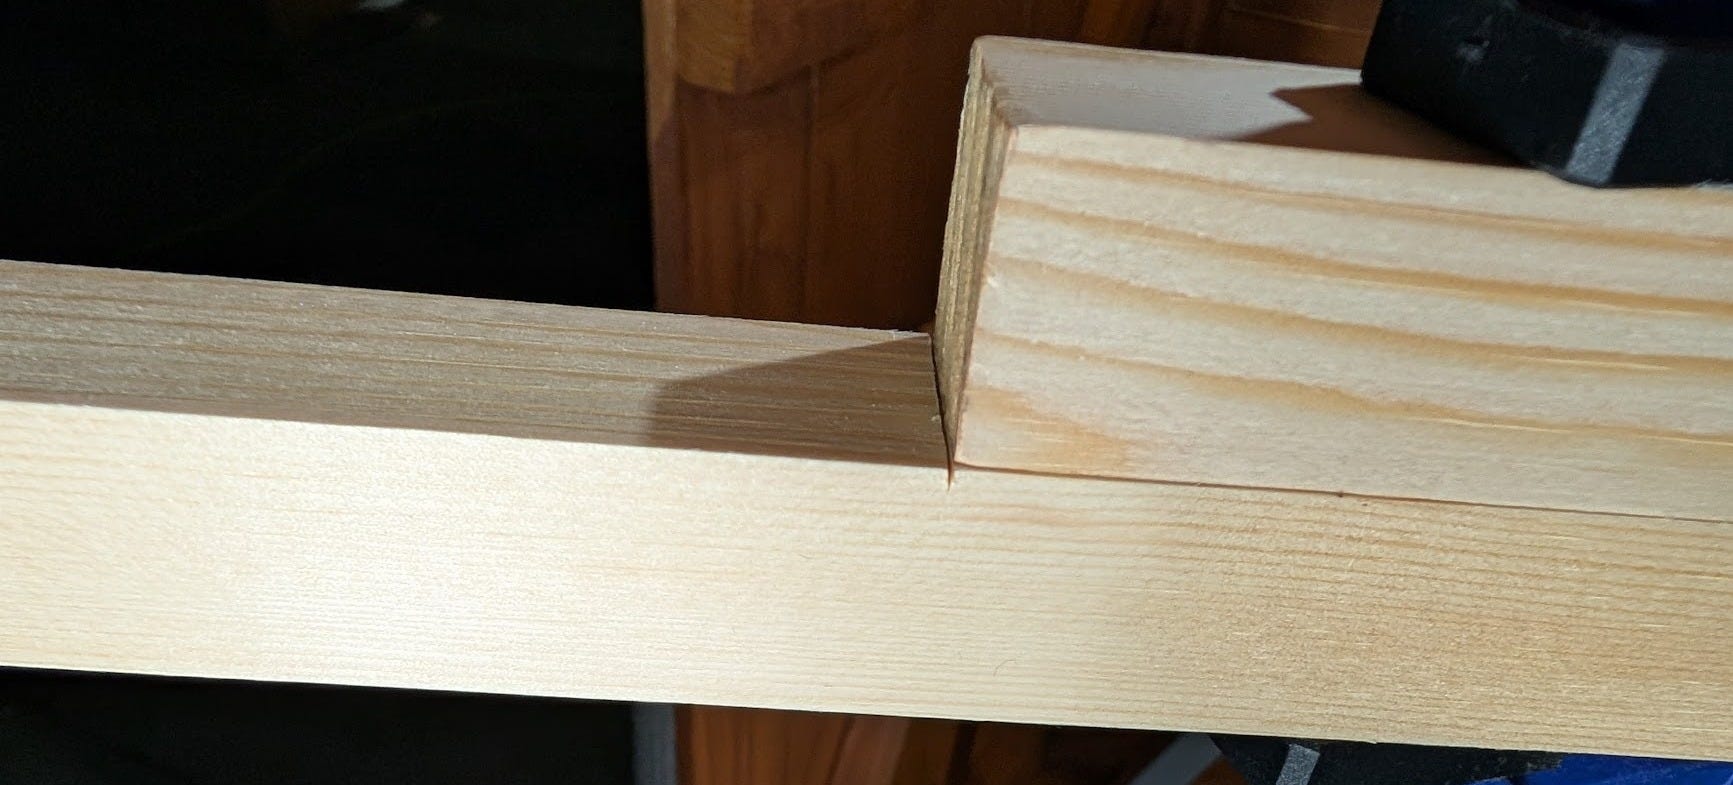
Transferring Those Lines
Here’s another great tip I’ve been using…
If you need multiple pieces of the same length, you don’t have to measure all of them. The cut length can simply be transferred onto the next piece and so on.
Here’s how I did it:
I made sure that both pieces were aligned squarely at the end and clamped them together.
Next, I used my knife to transfer the length of the cut piece.
Don’t do this with a pencil! You need to really get into the edge of the material else every transfer will be slightly longer!
Finishing Up
Wow, that was pretty exciting! The first-ever saw cuts from The Woodworking Shed. It was nice to finally pick up some tools and get to work on something woodworking-related.
Now I’m even more excited to start on my workbench! But I need to get the workshop finished first.
It’s a slow road but you know what they say:
Patience is a virtue…
…Good things come to those who wait. Blah blah. Get a move on Daniel.
I need to learn how to cut angles next…
What do you think of my first cuts!? Got any top tips to add? Let me know.
Enjoy this episode? Why not share it?
I want to build The Woodworking Shed into a strong engaging community. So if you know someone else who may enjoy it too: Don’t let them miss out - Share it!
New to The Shed? Pull up a chair…
Subscribe now to stay updated on my shed transformation, tool discoveries, and woodworking projects. Don’t miss out!
Support the Shed!
You can support The Woodworking Shed by becoming a paid subscriber or by buying me a coffee for a one-time boost. Your contribution helps me to keep delivering great content and justify all these tools!
Got something to say? Join the conversation!
Have a question, a tip, or just want to say hello? Leave a comment below! I love hearing from my readers and building a strong community!
Look forward to hearing from you -
~ The Woodworking Shed
Hungry for more?
Here’s the next episode:

Check out my other content! Head over to the homepage to find it all!

On angled cuts, unless it is really close to a rip, i.e., nearly parallel to the grain, I use a crosscut saw. Assuming it is sharp, tearout should be minimized.
This is where aesthetics are so subjective - I think the door looks good the way it is, as I like seeing the structural diagonal braces and the t&g paneling. And solid wood is so much prettier than osb. But if you are sheathing the door you will get a little insulation value, if that matters (and you could fill the cavity with insulation if it really matters).
My one car garage was a total rebuild (by a good contractor, not me) to replace a decrepit low garage with a flat roof that was rotting and leaked like a sieve, and the concrete floor had split down the middle. So, all new from a new slab to the high peaked roof. Friends and neighbors say I did this so I could have the beautiful carriage style doors made from old growth vertical grain fir. Maybe partially true ;) I much prefer a door that I can open quickly and silently, and without sacrificing indoor clearance, as compared to typical overhead garage doors. You would not believe how much I fit into a 9.5'x18' space with a high roof! The other advantage of the rebuild was the easy addition of electrical circuits - 2x240v and 2x120v.
My sympathy for the broken tooth. But without metal underneath to break the tooth, if you don't figure out how to avoid the mishap, next time the saw could be fine but end up damaging a nice bench or something else underneath the cut.
Lessons learned the hard way sometimes stick the best. Happy cutting!
I sometimes wrap painters masking tape upto the cutline, then saw, it stops the wood splitting. If that makes sense.